Why This Project Works So Well with Fat Quarters
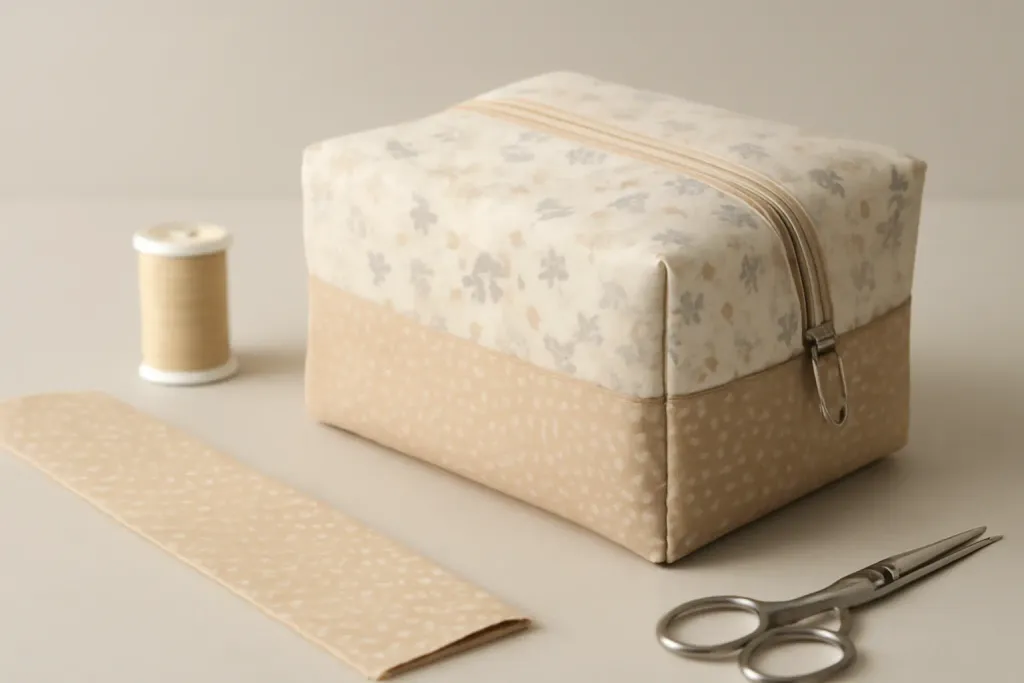
A zippered box pouch using fat quarters is a satisfying project because it feels useful right away. The shape is tidy, the zipper keeps contents secure, and the boxed base gives more room than a flat pouch. Fat quarters are often the perfect size for this kind of sewing, so you can make something practical without needing large fabric cuts.
This project is also beginner-friendly because it uses a few core skills: straight seams, zipper insertion, and simple box corners. If you have been ready to move beyond drawstring bags or flat zip pouches, this is a gentle next step. The finished pouch can hold makeup, charging cords, sewing notions, toiletries, small toys, or other items that need a home.
Fat quarters make planning easier too. You can pair a print with a solid, combine two prints that work well together, or use leftover fabric for a scrappier look. Because the pieces are small, this is a smart way to use fabric you already have. If you are shopping online, check product details carefully so you know the fabric weight and content before buying.
As with any sewing project, your machine may have its own preferred settings, feet, and stitch options. Check your machine manual for guidance on zipper sewing, stitch length, and presser foot use. Machines vary by brand and model, so the best results usually come from following your own machine’s instructions.
Materials and Cutting Plan
One reason people enjoy a zippered box pouch using fat quarters is that the materials list stays simple. You do not need a big stash to begin. A few coordinated fabrics, a zipper, and basic sewing supplies are enough to create something polished and useful.
Here is a simple materials list to guide your planning:
- 2 fat quarters for the exterior and lining
- 1 zipper, usually longer than the pouch opening so it can be trimmed later if needed
- Interfacing, if you want extra structure
- Thread that matches or coordinates with your fabrics
- Basic sewing tools such as scissors or a rotary cutter, ruler, clips or pins, and an iron
Fat quarters are convenient because they are pre-cut, but exact dimensions can vary slightly depending on how they were cut. Before you start, press your fabric and square up the edges if needed. That small step helps the pieces line up more accurately later. If you add interfacing, follow the product instructions and fuse it according to the manufacturer’s directions. The right interfacing can add body without making the pouch difficult to sew.
For a beginner-friendly pouch, keep the shape simple. A rectangular body with boxed corners is enough to create that useful storage-friendly form. If you want a larger pouch, adjust the width and height while keeping the same basic method. The key is to cut matching exterior and lining pieces so the pouch assembles evenly.
It can help to label your pieces as you cut them: exterior front, exterior back, lining front, lining back. Clear labels reduce confusion during zipper assembly, especially if you use two different fabrics. This small bit of organization helps the project feel calmer and keeps the sewing process moving smoothly.
Choosing Fabric and Zipper Combinations
For the best results, pair a medium-weight quilting cotton with a zipper that matches your pouch size and project purpose. Fat quarters work well because they offer enough contrast for outer fabric, lining, and zipper detail without extra yardage. You can mix prints and solids, but keep the fabrics similar in weight so the pouch holds its shape evenly. If your machine has specific zipper or presser-foot settings, check the manual before sewing.
Step-by-Step Assembly Overview
Start by cutting your fat quarters, zipper, and lining, then follow the pattern to mark seam allowances and box corners. Sew the outer pieces and lining separately, keeping the zipper centered and checking your machine’s manual for any zipper-foot guidance. After that, open the pouch flat, align the box corners, and stitch them to create depth. Trim excess seam allowance if needed, turn the pouch right side out, and press gently. Beginners should work slowly and test each step on scrap fabric before sewing the final version.
Browse our recommended products
Our featured picks refresh periodically. While we update them, our editorial guides can help you find the right pick.
See our guidesTips for Neat Zippers and Box Corners
Small details make a big difference in a pouch project. If you want your zippered box pouch using fat quarters to look crisp, focus on pressing, clipping, and keeping seam allowances consistent. Press after each major step instead of waiting until the end. A well-pressed seam is easier to line up, especially around the zipper.
When sewing near a zipper, move slowly and stop with the needle down if your machine manual allows it. That can help you pivot smoothly and stay in control. If your machine includes a zipper foot, follow the manual for the correct attachment method and needle position. Different machines handle zipper sewing differently, so it is best not to assume the setup is the same across models.
For cleaner corners, mark your box corner measurement before sewing. Use a ruler and fabric marker or chalk so both sides match. Matching corners help the pouch stand evenly. If one corner is deeper than the other, the pouch can lean or twist a little when filled. That is not the end of the world, but even corners give a more polished finish.
Clips can be useful when working with layered seams and zippers because they hold fabric without creating pin holes. If your fabric is slippery or bulky, clips may be easier than pins. You can also reduce bulk by grading seams where appropriate, trimming corners carefully, and pressing seam allowances in different directions to help the pouch lie flatter.
If your first pouch is not perfect, that is completely normal. Pouches are forgiving projects, and each one teaches you something useful. Maybe the zipper sat a little lower than expected or one corner needed more attention. Those small lessons make the next pouch easier and more consistent.
Easy Ways to Customize the Pouch
Once you have made one version, it is easy to adapt the design. The basic structure of a box pouch gives you plenty of room for personal touches while keeping the sewing process approachable. You can change the size, swap fabrics, add tabs, or adjust the lining to suit different uses.
Here are some beginner-friendly customization ideas:
- Use a different fat quarter print for each side of the exterior
- Choose a bright lining so items are easy to find inside the pouch
- Add a small fabric tab at one end of the zipper for a more finished look
- Use interfacing for a firmer pouch or skip it for a softer feel
- Make the pouch taller for toiletries or wider for craft supplies
You can also make matching sets in coordinating fabrics. A small pouch for earbuds, a medium pouch for notions, and a larger pouch for travel items can all follow the same general method. That makes fat quarter sewing especially appealing because the fabric pieces are already broken into manageable sizes. If you use scraps for accents, keep the main exterior pieces the same fabric weight so the pouch assembles evenly.
Labels, key rings, and decorative stitching can add personality without complicating the project too much. If you want to experiment with topstitching near the zipper, test your stitch length and thread choice on scraps first. Always use your machine manual as the final guide for settings and feet, especially when trying a new detail.
Common Beginner Mistakes and How to Avoid Them
Most first-time pouch issues are easy to fix or prevent. One common mistake is forgetting to open the zipper before sewing the outer edge. If the zipper stays closed, turning the pouch right side out can become frustrating. Another issue is cutting the pieces unevenly, which can make the lining and exterior sit awkwardly when assembled. Taking extra time at the cutting stage usually pays off later.
Another beginner concern is sewing too close to the zipper teeth. If this happens, the zipper may not glide smoothly. A slightly wider seam allowance near the zipper area can help the pouch function better. Likewise, sewing too far from the edge can leave a bulky or loose finish. Aim for consistency and use the seam allowance called for in your pattern or preferred method.
It also helps to watch fabric direction. If a print has a clear top and bottom, make sure the pieces are oriented the same way before sewing. This small step avoids upside-down lining surprises. For patterned fabric, check placement before stitching, especially if you want the design centered on the pouch front.
Finally, remember that machine behavior varies. Needle type, thread tension, and stitch appearance can differ from one machine to another. If your stitches look uneven or your fabric is not feeding smoothly, pause and consult your machine manual. It is always better to adjust settings based on your own model’s instructions than to guess. That approach keeps the project safer and usually leads to better results.
Finishing and Everyday Uses
Once your pouch is complete, give it a final press and check the seams, zipper ends, and lining closure. Smooth out any small wrinkles and make sure the corners are fully pushed out. A little finishing care helps the pouch look polished and feel sturdy in daily use.
This project also makes a practical gift idea, especially when you choose fabrics that suit the person receiving it. Because the pouch is small and useful, it works well for birthdays, holidays, teacher gifts, travel sets, or simple handmade surprises. You can even make several at once using different fat quarters, which is an efficient way to use coordinating fabric bundles.
In everyday use, the box shape helps the pouch stand up better than a flat pouch. That makes it helpful for desks, craft rooms, luggage, and tote bags. It can hold items that tend to roll around or get lost, and the zipper keeps everything contained. If you make one and find yourself reaching for it often, that is usually a sign the project worked well.
For readers building a small sewing collection, the zippered box pouch using fat quarters is a great project to keep in rotation. It is simple enough to repeat, flexible enough to personalize, and useful enough to make again and again. With a few fat quarters, a zipper, and patient stitching, you can turn fabric into something attractive and practical.