Why This Reversible Tote Bag Works
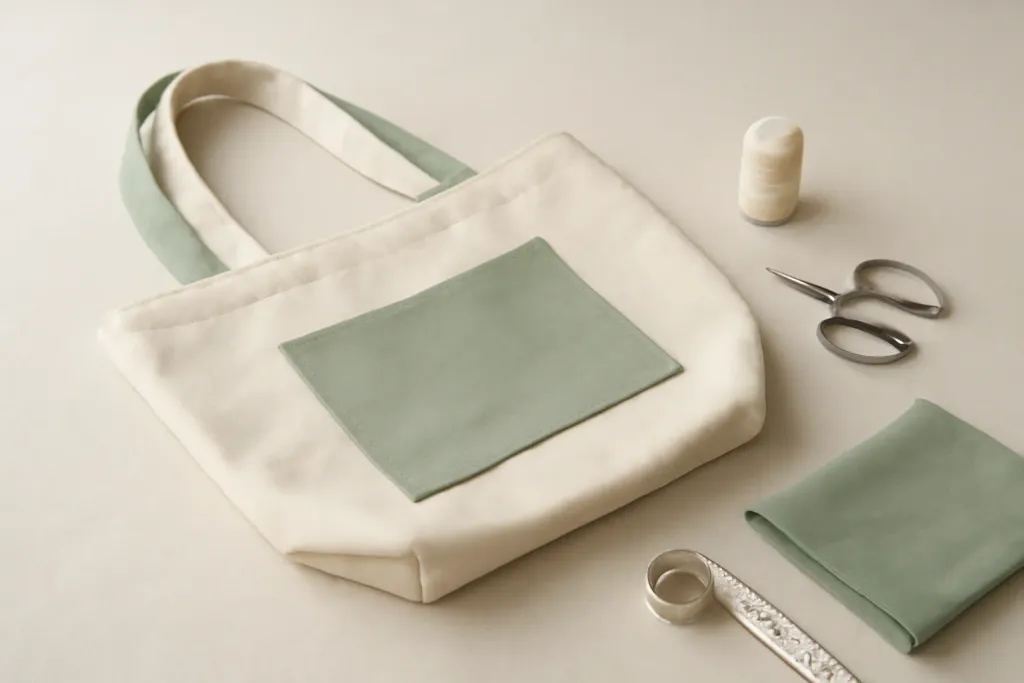
This reversible tote bag with flat bottom and pocket is beginner-friendly because the construction is straightforward, but the result looks polished and useful. The flat bottom helps the bag stand upright and gives it more usable space, while the pocket keeps small essentials easy to find. Since both sides are finished, you can switch fabrics for a different look without sewing a separate lining.
The design also works well with a wide range of cottons and home-decor fabrics, so it is a practical project for using fabric you already have. Accurate cutting and steady pressing make the biggest difference, and a simple topstitch helps the tote hold its shape. If your machine has a walking foot or a favorite topstitch setting, check your machine manual and use whichever options suit your model best.
Because the bag relies on basic seams and clean turning, it is a good confidence-building project for newer sewists and a satisfying quick make for experienced ones.
Materials and Tools
To sew a reversible tote bag with flat bottom and pocket, gather supplies that support both structure and clean finishing. The exact fabric choice is up to you, but medium-weight woven fabrics are often easier for beginners than very slippery or bulky materials. If you want a sturdier tote, consider adding interfacing to one or both fabric layers, following the instructions that come with the interfacing and checking your machine manual for tips on sewing fused layers.
- Two coordinating outer fabrics, or one outer fabric and one lining fabric, depending on your design
- Interfacing, if you want extra body
- Thread that matches or contrasts as desired
- Rotary cutter or scissors
- Ruler or measuring tape
- Pins or sewing clips
- Fabric marker or chalk
- Iron and pressing surface
- Optional pocket fabric, if you want the pocket to contrast
A basic sewing machine is enough for this project, but use the stitches and settings recommended in your manual. Some machines handle thick seams better with a zipper foot, edge-stitching foot, or a longer stitch length, but what works best depends on the model. If your machine struggles with multiple layers, reduce bulk at seam intersections, sew slowly, and test on offcuts before continuing.
For the bag shape itself, you will also want to plan the handle length and the base depth. Those choices affect how the tote carries and whether it sits neatly on a table. A measured approach makes the project feel easier, even if you are still building confidence.
Cutting and Planning Your Pieces
Before you cut, decide how you want the finished reversible tote bag with flat bottom and pocket to function. A roomy everyday tote may need longer handles and a deeper base, while a smaller project bag can be shorter and more compact. Sketching the layout on paper or on the wrong side of the fabric can help you visualize the final size before you commit to cutting.
For a reversible design, many sewists cut two main body pieces in each fabric so the inside can become the outside. You can also add a pocket to one or both sides, depending on how symmetrical you want the bag to look. If you want the pocket to remain visible on one side only, make sure it is centered and placed high enough to stay useful after the flat bottom is formed.
Measure carefully and label your pieces if needed. This is especially helpful when both fabrics are similar in color or print. It is easy to mix up panels once you start sewing, so a small chalk mark or paper note can save time later. If you are new to bag making, build a little extra seam allowance into your plan rather than cutting too close to the edge.
Take time to press your fabric before cutting. Pressing helps smooth wrinkles and gives you more accurate measurements. It also makes layout easier, which is especially useful when you are trying to match a print or decide where the pocket should land.
Making the Pocket
The pocket is often the detail that makes the tote feel practical right away. You can sew a simple patch pocket, a divided pocket, or even a pair of mirrored pockets if you want storage on both sides. For a beginner-friendly version, a single pocket is usually the easiest starting point.
To make a clean pocket, fold and press the top edge first so it has a neat finish. If the fabric tends to fray, you can finish the edge by folding it under twice or using your preferred seam finish. Then position the pocket on the body piece and pin or clip it in place. Check the placement carefully before stitching, because once the pocket is attached, changing it means unpicking seams.
Stitch slowly around the sides and bottom of the pocket, leaving the top open. If you want extra strength, reinforce the top corners with a few backstitches or a small bar tack, depending on your machine and comfort level. Again, use your manual for guidance on stitch selection and reinforcement features. Different machines produce slightly different results, so a scrap test is a smart habit.
Keep the pocket shape simple if this is your first tote. Straight lines are easier to sew and usually look tidy after pressing. If you enjoy a more custom look, you can add gentle curve shaping or topstitching, but those details are optional rather than necessary for a functional bag.
Browse our recommended products
Our featured picks refresh periodically. While we update them, our editorial guides can help you find the right pick.
See our guidesConstructing the Bag Body
Once the pocket is attached, you can sew the main body pieces together. A reversible tote typically uses two fabric layers sewn right sides together, then turned so the seams are enclosed. This is a good method for creating a clean finish without visible raw edges.
Start by matching the main panels carefully and stitching the side and bottom seams. If your bag includes interfacing, the layers may feel thicker than quilting cotton alone. Sew at a controlled pace and stop to adjust as needed. Never force fabric through the machine, and do not try internal machine adjustments beyond what your manual safely explains.
To create the flat bottom, shape the lower corners after the side seams are sewn. This usually involves flattening a corner so the side seam and bottom seam align, then measuring and sewing across the corner at a right angle to create depth. The exact measurement controls how deep the base becomes, so a small test version or scrap practice can help you understand the result before sewing the final bag.
Repeat the corner shaping on the second layer if your design uses separate panels, then trim and press the seam allowances neatly. Accurate pressing is a quiet but important part of bag making. It helps the tote lie flat where it should and gives the bottom a more defined shape.
Turning and Reversible Finishing
Turning the tote is the moment when the reversible design starts to feel real. Depending on your construction method, you may leave a turning opening in a seam or use another finishing method that suits your pattern plan. Keep the opening large enough to turn the bag comfortably, then close it neatly after the bag is right side out.
After turning, push out the corners gently using a blunt tool if needed. Avoid anything sharp that could damage the fabric or stitching. Press the bag carefully so the top edge and corners look crisp. This step matters because a reversible tote shows both sides, so a clean finish on one side should be matched by a neat finish on the other.
If you want the top edge to sit especially smoothly, topstitching can help, but only if your machine handles the layers well. Check your machine manual for the correct presser foot, stitch length, and any recommendations for heavier seams. What looks best on one machine may need a slightly different approach on another, especially when fabrics and interfacing vary.
Close the turning opening by hand or with a careful topstitch, depending on your preferred method and your project structure. Take your time here. A tidy closure improves the overall finish and helps the bag feel complete.
Handles and Final Details
Handles should feel comfortable in the hand or over the shoulder, depending on how you plan to use the tote. You can make them from the main fabric, a contrasting fabric, or a combination of fabric and interfacing for more body. Longer straps work well for shoulder carry, while shorter handles can feel neat and sturdy for hand carry.
Before attaching the handles, check placement from both sides of the bag. Since the tote is reversible, the handle anchors should look intentional no matter which side is showing. This is a good moment to step back and confirm symmetry. Small placement differences become more noticeable on a bag that can be turned inside out.
Secure the handles with strong stitching. Depending on your machine and the thickness of the layers, you may want to sew a box or rectangle reinforcement at the attachment points. Use the techniques your manual recommends for multiple layers, and test the stitch on scraps first if you are unsure. A slow, steady pace often produces a cleaner result than rushing through a thick seam.
Once the handles are attached, give the bag a final press and check the pocket, corners, and top edge. If anything feels uneven, make small corrections now while the project is still easy to handle. The goal is not perfection in every stitch, but a finished tote that feels useful, balanced, and made with care.
Styling, Gift Ideas, and Care
A reversible tote bag with flat bottom and pocket can suit many styles, from casual everyday errands to project storage or travel organization. Because you have two fabric faces, you can lean into the reversible feature by choosing one side that is bold and one that is calm, or by using coordinating prints that feel equally finished.
If you are making the tote as a gift, you can personalize it with fabric choices that reflect the recipient’s taste. Keep the shape simple and useful, and let the fabric combination do the visual work. A pocket adds everyday convenience, while the flat bottom gives the bag a structure that feels practical.
For care, follow the fabric and interfacing instructions you used. In general, gentle washing and air drying are kinder to many handmade bags, but the right method depends on the materials. If you are unsure, test a small fabric offcut before washing the finished tote. This is especially important if you used prints, specialty finishes, or fusible products.
With a little planning, this project can become a repeat make rather than a one-time bag. You can adjust the size, change the pocket style, or swap handles for different uses. That flexibility is part of what makes this beginner-friendly project so satisfying.