Why Presser Feet Matter More Than Many Beginners Expect
Presser feet help guide fabric, control stitch placement, and make each task easier and neater. The right foot can improve accuracy, reduce slipping, and save time on everyday sewing. Different machines use different attachments, so always check your manual before buying or changing feet. When you match the foot to the job, even a beginner can get cleaner results with less frustration.
1. Standard Zigzag Foot
The standard zigzag foot is the one most sewers start with, and for good reason. It handles straight stitching, zigzag stitches, and many basic utility stitches, making it a reliable everyday choice. On many machines, it is the foot that comes installed by default. Because machine systems vary, check your manual to confirm compatibility and proper use before sewing.
2. Zipper Foot
A zipper foot is one of the most practical specialty feet to add early. It lets you stitch close to bulky areas, such as zipper coils, cording, piping, or thick seam edges, without the foot getting in the way. That close control makes it easier to sew neat, even lines where the regular foot feels too wide.
For garment sewing, a zipper foot helps with invisible or standard zippers, depending on the style and your technique. It can also be useful for finishing edges, attaching trims, or stitching right beside a raised detail. Many sewists discover that they use the zipper foot for far more than zippers once it is in the kit.
There are different zipper foot styles, including narrow versions and adjustable versions that can be placed on either side of the needle. Check your machine manual to confirm which type works with your model and how it should be installed. If your machine uses a low-shank, high-shank, or snap-on system, that detail matters when you shop for accessories.
For beginners, the zipper foot is a confidence builder because it makes intimidating tasks feel more manageable. When you can sew close to an edge without forcing the fabric, your results usually look cleaner and more controlled.
Browse our recommended products
Our featured picks refresh periodically. While we update them, our editorial guides can help you find the right pick.
See our guides3. Walking Foot
The walking foot is a favorite for layered sewing because it helps feed the top layer and bottom layer through the machine more evenly. That can be useful when you are working with quilts, plaids, slippery fabrics, or multiple layers that want to shift. If you have ever seen layers creeping out of alignment, this foot may help reduce that problem.
It is often recommended for projects where the machine’s regular feed dogs need a little extra support. For example, it can help with quilts, bulky seams, and some topstitching situations. It may also be useful for matching stripes or checks because the fabric tends to move more consistently under the foot.
Not every walking foot is universal. Some are designed for low-shank machines, some for high-shank machines, and some are made for specific brands or models. Read your manual carefully before buying one, especially if your machine has an accessory system that requires a particular attachment method. The right fit matters for both performance and safety.
Beginners often like the walking foot because it can make tricky fabric combinations feel less slippery and less stubborn. It is not magic, but it is a very helpful tool when you are sewing projects with layers that need better control.
4. Buttonhole Foot
A buttonhole foot helps you create buttonholes with more consistency than trying to measure and stitch them entirely by hand-guided machine movement. For many sewists, it is the foot that turns buttonholes from an anxiety-inducing task into a repeatable process. That alone makes it worth considering for your kit.
Buttonholes matter on shirts, blouses, dresses, bags, cuffs, and home sewing projects that need closures. A buttonhole foot usually works with your machine’s buttonhole stitch settings to help size and stitch the opening in a more controlled way. Depending on the machine, the process may be fully automatic, semi-automatic, or require a step-by-step approach.
Because buttonhole systems vary widely, your manual is the best place to start. Some machines include multiple buttonhole styles, while others support only one or two methods. Before you buy an accessory foot, confirm that your machine can use it and that you understand the order of operations for your specific model.
For a beginner, this foot is valuable because it supports a polished finish on everyday projects. Buttonholes are small details, but they can make a handmade item look much more complete and functional.
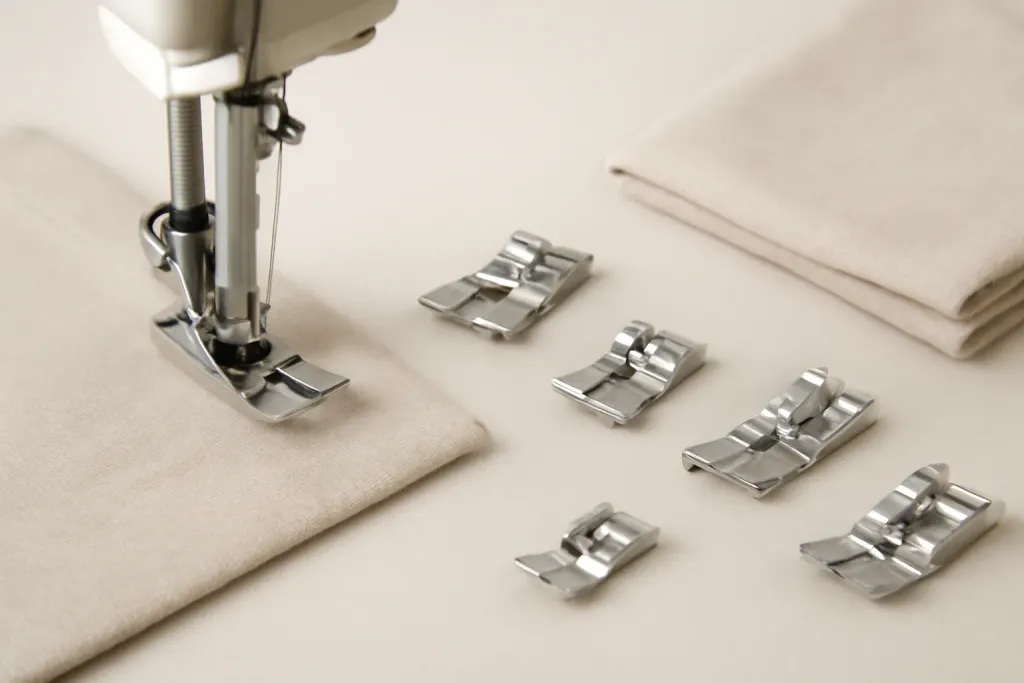
5. Blind Hem Foot
The blind hem foot is designed to help you stitch hems that are less visible from the right side of the fabric. It is commonly used for trousers, skirts, dresses, and curtains when you want a neat finish that does not show a bold line of stitching. If you have struggled to keep a hem fold even, this foot can make the job easier.
Many beginners find blind hems intimidating because the stitch needs to catch just a little bit of the folded fabric while remaining discreet on the outside. A blind hem foot usually includes a guide that helps keep the fold aligned while you sew. That guide can make a big difference in control and consistency.
As always, compatibility matters. Some blind hem feet are designed for a certain shank height or foot attachment style, and some are shaped to match specific machine stitches. Look at your manual to confirm which blind hem stitch settings are recommended and how your machine expects the fabric fold to be positioned.
This is a useful addition if you sew clothing or soft furnishings and want a cleaner finish than a basic topstitched hem. It is a foot that rewards a little practice, but it can quickly become one of your most appreciated tools.
6. Overedge and Rolled Hem Feet
Overedge and rolled hem feet help finish raw edges in a more controlled way. An overedge foot can guide stitches along the edge of fabric to help reduce fraying, while a rolled hem foot is often used to create a narrow, tidy hem on lightweight fabrics. These feet are especially helpful when you want a clean finish without bulky folding.
They are useful for lightweight garments, scarves, napkins, and other projects where delicate edges benefit from a neat appearance. A rolled hem foot can be especially handy on fabrics that are thin or slippery, where handling a tiny fold by hand may be frustrating. An overedge style can help you keep seam finishes more consistent.
Because machines handle edge-finishing stitches differently, check your manual before assuming one foot will work with every stitch option. Some machines are built to pair with specific stitch settings, and some accessory feet are intended only for particular models. Using the wrong combination can lead to poor results or frustration.
For a beginner, these feet are worth adding when you are ready to move beyond simple seams. They offer a way to make projects look more finished, even when the fabric itself is lightweight or difficult to control.
Browse our recommended products
Our featured picks refresh periodically. While we update them, our editorial guides can help you find the right pick.
See our guides7. Button and Cording Foot
A button foot or cording foot can help with sewing on buttons, attaching cords, or creating decorative finishes that need more control than a standard foot provides. If you make garments, bags, or home accessories, these small tasks come up often enough to justify a dedicated foot. Some versions are designed for simple button sewing, while others help hold cords in place for decorative stitching.
Button sewing is one area where the right foot can save time and improve consistency. Holding a button securely while the machine stitches through its holes can be awkward by hand, especially when you want the button positioned evenly. A button foot or button sewing foot can make that process easier and more stable, though the exact method depends on the machine.
Cording feet can also support decorative work, including couching-style effects on compatible machines. That said, always check your manual for the correct stitch width, needle position, and attachment method. Decorative techniques often require a little setup, and it is best to follow the manufacturer’s guidance.
This is a good category to explore once your basic sewing feels comfortable. It expands what your machine can do without requiring a complicated upgrade, and it adds flexibility for both functional and decorative projects.
8. Appliqué and Open-Toe Feet
An appliqué foot or open-toe foot gives you a better view of the needle area, which can be very helpful when you need accuracy. These feet are popular for appliqué, decorative stitching, edge stitching, and any task where seeing exactly where the needle lands matters. If you like the idea of more control and better visibility, this is a strong addition.
Open-toe feet are often appreciated by beginners because they make the sewing area less cramped visually. You can more easily see markings, fabric edges, and curves as you sew. That can reduce hesitation when you are navigating turns or placing stitches close to an edge.
Appliqué feet may also help you manage satin stitches or other decorative finishes, depending on your machine and stitch selection. Because not all machines support the same stitch widths or specialty settings, check your manual before choosing a foot for decorative work. The foot itself is only part of the setup; the stitch and needle placement matter too.
If you enjoy small projects, labels, patches, or decorative details, this foot can open up a lot of creative possibilities. It is especially helpful when you want your work area to feel less crowded and more precise.
9. How to Build Your Kit Without Overbuying
Build your kit around the sewing you actually do. Start with the feet you’ll reach for most, then add specialty options only when a project keeps slowing you down. A standard zigzag foot, zipper foot, and buttonhole foot cover many basics; from there, add tools for hems, quilting, or decorative finishes as your skills grow. Your machine may need specific shanks, snaps, or adapters, so check your manual before buying. Keeping a small, intentional set helps you avoid duplicates and stay focused on feet that truly expand what your machine can do.