Why Seam Allowance Accuracy Matters
Accurate seam allowances affect fit, matching points, and how neatly pieces come together. Even small changes can make blocks, garments, or home-sewing projects drift out of alignment.
That is why guides and tape tricks are worth learning early. They help you repeat the same seam width with less guesswork, which means fewer surprises at pressing and assembly.
Start with the Guide Built Into Your Machine
Most machines already include a helpful guide: the markings on the throat plate or needle plate. Start there before adding extra tools. Align your fabric edge with the line that matches your desired seam allowance, then sew slowly and keep the edge steady as it passes the mark.
Because machine models vary, verify the markings in your manual and test them on scrap fabric. If the built-in guide is hard to see, pair it with tape or a removable visual marker for better visibility.
Using Tape as a Seam Guide
Using tape as a seam guide is one of the easiest ways to improve accurate seam allowances with guides and tape tricks. Place low-tack painter’s tape or washi tape on the needle plate, aligned with the seam allowance you want. The tape edge gives your eye a clear line to follow while you sew.
Before stitching, test on scraps and confirm the line is exact for your machine and presser foot. Tape can shift, so replace it as needed and avoid covering moving parts. Check your machine manual if you are unsure where tape is safe to place. This simple visual cue can help beginners sew steadier lines without adding bulky tools.
A Simple Quarter-Inch Guide for Small Projects
For small projects, a quarter-inch guide can make piecing easier and more consistent. A narrow strip of tape placed at the correct distance from the needle gives you a clear boundary for tiny seam allowances.
Measure carefully with your machine’s presser foot and manual, then sew a few practice seams on scraps. If the line feels too close, adjust it before starting your project. This small setup is especially useful for patchwork and other precise work.
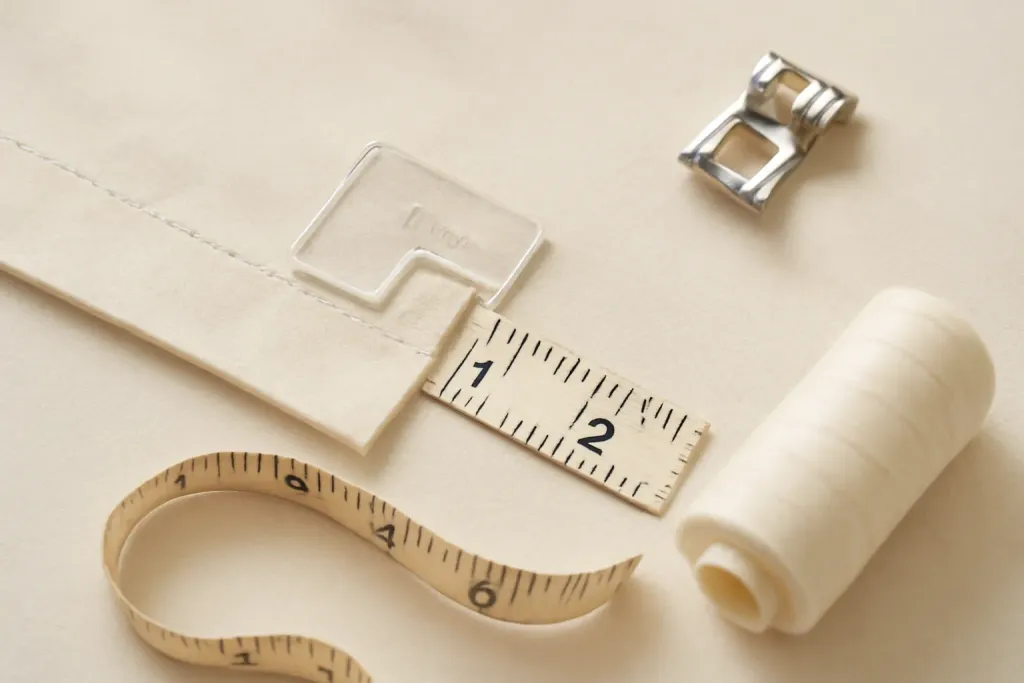
Edge Stops, Sticky Notes, and Other Easy Visual Helpers
Edge stops and sticky notes can act as simple visual helpers when you want straighter, more accurate stitching. Place a removable note or small marker beside your sewing path so you can track where the fabric edge should stay.
Use only light, temporary placement so nothing interferes with the needle, foot, or feed dogs. As always, check your manual for any machine-specific cautions. These low-tech cues are easy to remove and can be surprisingly effective.
Browse our recommended products
Our featured picks refresh periodically. While we update them, our editorial guides can help you find the right pick.
See our guidesKeep the Fabric Moving Straight
To keep the fabric moving straight, guide it gently instead of pushing or pulling. Let the feed dogs do the work, and watch your chosen line rather than the needle itself.
Use a steady pace, keep your hands relaxed, and stop to realign if the fabric starts to drift. If your machine or fabric behaves differently, check the manual and test on scraps first.
Different Fabrics Need Different Approaches
Some fabrics are cooperative and stay exactly where you place them. Others shift, stretch, or bulk up under the presser foot. Lightweight cotton, denim, canvas, knits, and slippery fabrics all behave differently, so a guide that works on one project may need a small change for another.
For thick fabrics, the seam edge may ride differently against the guide because the layers add bulk. In that case, a tape line can still help, but you may want to test with the exact number of layers you plan to sew. For knits, gentle handling matters even more because stretching can make the seam allowance look inaccurate even when the line itself is correct. If the fabric stretches while it is being guided, the seam can end up wider or narrower than intended without any obvious warning.
Some fabrics are easier to control with a walking foot, a specialty foot, or a different stitch length, if your machine and manual support those options. The important thing is to test first and work with the material instead of against it. Accuracy is not only about the guide; it is also about how the fabric behaves as it passes under the needle. A guide can point you in the right direction, but the material still decides how smoothly it moves.
If you are unsure which setup is best, keep your testing simple: one scrap, one seam, one measurement. That routine helps you learn how each fabric type responds without making the process feel overwhelming. You do not need a long trial to learn something useful. Often, one careful sample tells you enough to adjust your guide before sewing the final pieces.
It is also smart to test the same fabric after pressing it, especially if the project will be pressed as you go. Some fabrics settle differently after heat and steam, and that can change how the edges sit next to your guide. A quick press on the sample gives you a more realistic picture of how the seam allowance will behave once the project is underway.
Common Mistakes and Easy Fixes
A very common mistake is placing the tape too close to the needle without testing. That can lead to a seam that is narrower than expected. Another common issue is using a guide line that is hard to see, which makes you look down too often and lose your rhythm. If a guide is not helping, simplify it.
Another problem is forgetting that the seam allowance starts from the needle position you are actually using. If you move the needle left or right for topstitching or decorative work, your seam allowance changes too. Always recheck the relationship between needle position, presser foot, and guide before sewing the final piece. A small needle shift can change the visible distance enough to affect the fit of your project.
If your seams are inconsistent, try this reset: remove the tape, stitch a fresh test seam, measure carefully, then place a new guide based on the result. This is often faster than continuing to sew with a setup that is already off. It also gives you a clean starting point instead of trying to correct several small errors at once.
Do not forget to re-test after changing a needle, switching feet, or moving from one fabric type to another. Those small changes can affect where the stitch line lands. A few minutes of checking can prevent a lot of frustration. Beginners sometimes assume the old measurement will still be correct, but sewing is full of little setup changes that can quietly shift the result.
If you notice that your seam is accurate at the beginning and drifts later, look at your body position and how the fabric is entering the machine. Sometimes the issue is not the guide at all but the angle of your hands or the way bulk is building up on one side of the presser foot. Adjusting your posture, supporting the fabric, or slowing down at a bulky section can restore accuracy without changing the guide.
Build a Repeatable Routine You Can Trust
The best part of using guides and tape tricks is that they turn seam allowance accuracy into a repeatable routine. Instead of relying on guesswork, you can create a simple habit: check the manual, sew a test seam, measure, adjust, and sew again. That routine is easy to remember and easy to repeat.
Over time, you may even develop a small setup kit near your machine with removable tape, a ruler, scrap fabric, and a marking tool. Having those items ready makes it more likely that you will test before every important seam. That habit can save time, reduce mistakes, and make sewing feel much more approachable. It also keeps your workspace organized so that you are not searching for tools in the middle of a project.
Accuracy does not mean perfection on the first try. It means knowing how to correct course. Guides and tape tricks give you a way to do that without stress. They are simple tools, but they can make a big difference in the final look of your project. Once you learn how to measure, adjust, and repeat, you will have a dependable method you can return to whenever a pattern calls for a specific seam width.
As your confidence grows, you may find that you need the tape less often. That is a good sign. It means your eye has learned to follow the line and your hands know how to keep the fabric steady. Until then, let the tools do some of the work for you. There is no award for doing it the hard way when a clear guide can make the process smoother and more enjoyable.
If you want a simple finish point for your routine, end each setup by sewing one last scrap and measuring it before moving to the real project. That final check creates a reliable bridge between practice and production. For many beginners, that small habit is what makes sewing feel less stressful and much more controlled from one project to the next.