Scrunchies Three Ways: A Simple Place to Start
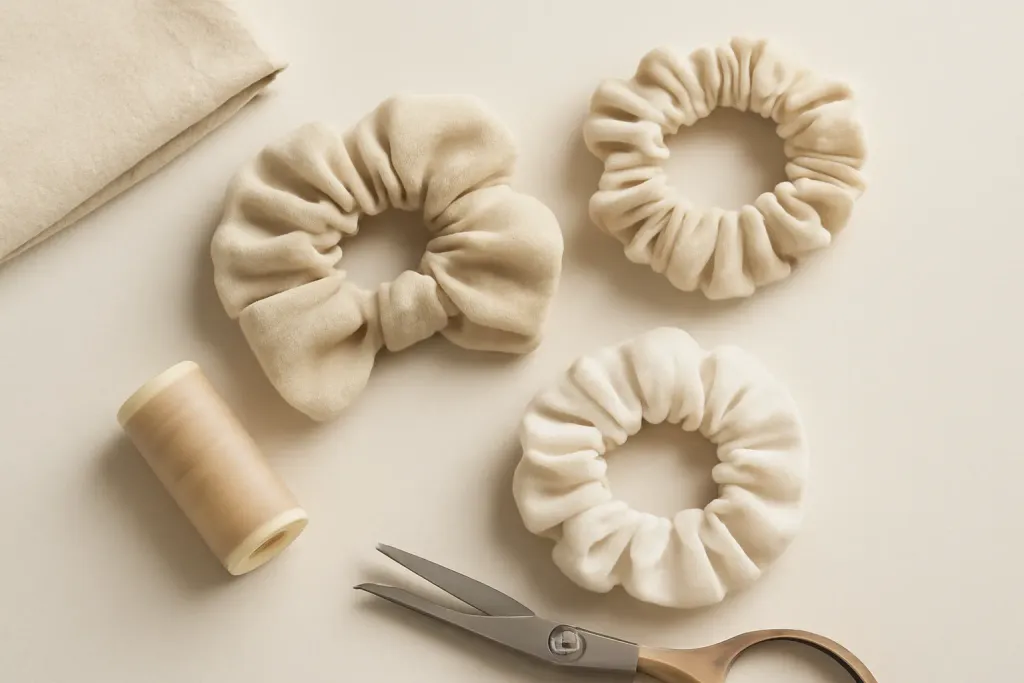
If you want a quick sewing win, scrunchies three ways basic bow and ruffle is a great beginner project. Scrunchies are small, useful, and forgiving, so they are ideal for practicing straight seams, turning tubes, and neat edge finishes. They are also a smart way to use fabric scraps because cotton, satin, velvet, and other lightweight fabrics can all work well.
In this guide, you will make one classic basic scrunchie, one bow scrunchie, and one ruffle scrunchie. All three use the same core construction, so once you learn the base method, the other styles feel much easier. If you are new to sewing, focus on steady steps rather than speed. Even a slightly uneven scrunchie can still look cute and wearable.
Before you begin, check your sewing machine manual for stitch settings, needle recommendations, and any care notes specific to your model. Machines and fabrics vary by manufacturer, so the best results come from the guidance that came with your own machine. Keep the project simple, use a fresh needle if needed, and choose a stitch length that suits lightweight accessory sewing.
Materials and Fabric Tips
You do not need much to sew these scrunchies. A few small fabric pieces, elastic, thread, and basic tools are enough, which makes this project friendly for scraps and leftover yardage. Cotton is the easiest place to start because it presses well and sews smoothly. If you want a softer drape or a dressier look, satin, rayon, or velvet can also work, though they may slip a little more under the presser foot.
For beginners, it helps to choose fabric that is not too thick or too stretchy. Very bulky fabrics can make the tube harder to turn, while very slippery fabrics may need extra pins or clips. Elastic should be soft enough to gather comfortably without feeling stiff. A basic narrow elastic is usually enough for a standard scrunchie shape.
- Fabric scraps cut into long rectangles
- Elastic pieces for each scrunchie
- Matching or coordinating thread
- Scissors or a rotary cutter
- Pins or clips
- Safety pin, bodkin, or turning tool
- Iron for pressing, if your fabric allows it
If you are shopping for sewing tools or elastic, remember that product fit and performance vary by brand and model. Read product descriptions carefully and compare them to your own project needs. A good beginner approach is to choose simple tools that support this project rather than overbuying specialty supplies you may not use right away.
How to Sew the Basic Scrunchie
The basic scrunchie is the foundation for all three versions. Start by cutting a fabric rectangle and folding it lengthwise with right sides together. Sew along the long edge to make a tube. Turn the tube right side out and press it gently if the fabric allows. Pressing is optional, but it can help the scrunchie look cleaner and make the finish easier.
Next, form the casing for the elastic by bringing the short ends together, matching the seam as desired. Slide the elastic through the tube using a safety pin or turning tool. Hold one end of the elastic firmly while easing the rest through. This step goes more smoothly if you keep a close grip on the end so it does not slip inside the tube.
Once the elastic reaches both ends, overlap the elastic ends and sew them securely together. Many sewists like to stitch the elastic ends in a box or with several back-and-forth passes. Then tuck the raw fabric ends inward and close the opening with a neat hand stitch or a topstitch if you prefer a faster finish. Try not to stretch the scrunchie too much while sewing the opening closed so the shape stays even.
One advantage of the basic version is that it teaches the rhythm of the whole project: sew, turn, thread elastic, and close. If your first attempt is not perfect, that is completely normal. Small uneven spots are part of learning, and scrunchies are forgiving enough that they usually still look lovely when worn.
How to Add a Bow
The bow scrunchie uses the same base as the basic version, with one extra detail: a decorative bow attached to the outside. This gives the scrunchie a playful, polished look while keeping the sewing simple. You can make the bow from the same fabric as the scrunchie for a coordinated style, or choose a contrasting print for a clearer accent.
To make the bow, cut a small rectangle, fold it right sides together, and sew around the edges, leaving a small opening for turning. Turn it right side out, press gently, and close the opening by hand or with a tiny topstitch. Then pinch the center of the rectangle to create the bow shape. Wrap a narrow fabric strip or thread several times around the center to secure the gathers and define the bow.
Attach the bow to the scrunchie by hand sewing it onto the seam or stitching it firmly in place where it looks balanced. A common placement is along the top of the scrunchie so the bow sits visibly when worn. If you want a softer bow, make the rectangle slightly wider. If you want a compact bow, shorten the piece a little and use a tighter center wrap.
This style is a nice way to practice small-scale shaping. The goal is not perfection but proportion. If the bow looks a little different from your sketch, that is fine. Handmade accessories often look best when they have a bit of personality.
Browse our recommended products
Our featured picks refresh periodically. While we update them, our editorial guides can help you find the right pick.
See our guidesHow to Make the Ruffle Effect
The ruffle scrunchie adds texture and movement. Instead of a smooth outside, the fabric is gathered to create a fuller, more decorative look. The easiest way to make this style is to start with a slightly longer fabric strip than you would use for the basic version. After stitching the tube and inserting the elastic, the extra fullness creates the ruffled appearance.
Some sewists also like to gather the fabric before inserting the elastic, especially if they want a very full finish. Either way, the idea is to let the fabric puff and fall in soft folds. When choosing fabric for a ruffle scrunchie, lighter woven fabrics and fabrics with some drape often show the shape nicely. If the fabric is too thick, the ruffle can look bulky rather than soft.
After the elastic is in place and secured, gently redistribute the gathers so they sit evenly around the scrunchie. This is the step that makes the design look intentional. If one section looks too crowded, slide the fabric slightly around the elastic until the fullness is balanced. Then close the opening and give the scrunchie a final shape check.
The ruffle version is especially helpful if you want a more romantic or vintage-inspired accessory. It pairs well with florals, soft solids, and lightweight prints. Even if you are sewing with scraps, the extra texture can make a simple fabric remnant feel special.
Beginner Sewing Tips That Help All Three Styles
These three scrunchie styles share the same basic sewing skills, so a few habits can improve every version. First, use a seam allowance that you can repeat comfortably. Consistency matters more than exact numbers when you are learning. Second, backstitch at the beginning and end of seams where appropriate so your tube stays secure. Third, take your time turning narrow tubes so you do not stress the seam or stretch the fabric too much.
If your machine struggles with thin or slippery fabric, slow down and test a scrap first. Check your machine manual for needle size, presser-foot guidance, and stitch suggestions. Different models handle lightweight fabrics differently, and the manual is the safest place to start. Avoid forcing fabric through the machine, since that can cause skipped stitches or uneven seams. A steady pace usually works better than trying to sew quickly.
Pressing can make a noticeable difference, but it should always suit the fabric. Some fabrics handle heat well, while others need a lower setting or a pressing cloth. If you are unsure, test a small scrap first. For accessories like scrunchies, a gentle press is often enough to help edges lie flatter without flattening the whole shape.
Thread choice matters too. A good all-purpose thread works for most beginner scrunchies. Matching the thread color is helpful, but not required. If you are experimenting with contrast thread, use it as a design detail rather than worrying about tiny imperfections. Handmade accessories are a great place to learn by doing.
Styling and Finishing Ideas
Styling a scrunchie is part of the fun, and the three versions here each work a little differently. The basic scrunchie is a fast everyday option, while the bow style adds a decorative finish that stands out on a ponytail or bun. The ruffle version gives extra volume and a softer look, especially in prints or lightweight fabrics.
For the cleanest finish, try matching thread to your fabric and press the seam allowances as you go. If you want a more polished look, topstitching can help hold the seam flat, but use a length and tension that suit your fabric and always check your machine’s manual before adjusting settings. Before wearing, give the elastic a quick tug to make sure it sits comfortably inside the casing.
These scrunchies also make easy gifts or stash-busting projects. Once you’ve made one, you can experiment with different widths, prints, and textures to suit your style.
Finish Your Set and Keep Practicing
If you have sewn the basic, bow, and ruffle versions, you now have a complete introduction to scrunchies three ways basic bow and ruffle. Each style builds on the same simple foundation, so the more you make, the more natural the process becomes. That is the real value of a project like this: it teaches useful skills without asking for a lot of materials, time, or advanced techniques.
Use your first set as practice, then try changing one detail at a time. You might adjust the fabric type, make the elastic a little tighter or looser, or change the size of the bow. Small experiments help you learn what you like. If your machine manual suggests any special notes for lightweight or slippery fabrics, keep those handy for future projects too.
Most of all, let the project stay enjoyable. Scrunchies are quick enough to finish in a single sitting, but they also leave room for creativity. Whether you prefer the simplicity of the basic style, the charm of the bow, or the texture of the ruffle, you now have a friendly project you can return to whenever you want a satisfying sew.