Why Slippery Fabrics Make Buttonholes Tricky
Getting perfect buttonholes on slippery fabrics can feel harder than it should, especially when the fabric wants to slide, stretch, or shift as soon as the presser foot lowers. Fabrics like satin, silk, charmeuse, rayon challis, lightweight polyester, and some lining fabrics often have a smooth surface that resists the steady feeding your machine needs for a clean buttonhole. Even a small amount of movement can make the stitches look uneven or cause the buttonhole to end up too tight, too wide, or slightly distorted.
The good news is that this is usually a setup problem, not a sewing skill problem. Slippery fabrics need extra help so the layers stay stable while the machine forms the dense stitching that buttonholes require. A little preparation can make a big difference, and beginners often find that the right stabilizer, a careful marking method, and a few test stitches solve most of the frustration. Because every sewing machine behaves a little differently, it is always worth checking your own machine’s manual before using a buttonhole foot, changing stitch density, or adjusting presser foot pressure.
Think of the process as giving the fabric a more controlled path. Once you reduce shifting and support the area around the buttonhole, your machine can do what it was designed to do: sew a neat, secure opening that matches the garment and the button it is meant to hold.
Choose the Right Stabilizer and Support
For many sewists, the fastest way to improve buttonholes is to add support before stitching. Slippery fabrics often benefit from interfacing or a stabilizer that gives the fabric more body. A lightweight fusible interfacing can help keep the area from stretching, while a tear-away or wash-away stabilizer may provide extra control during stitching. The best choice depends on the fabric weight, drape, and how the finished garment should feel, so it helps to test on scraps first.
If the fabric is very delicate, avoid over-stiffening the whole garment. Instead, reinforce only the buttonhole area with a small piece of interfacing placed on the wrong side. This keeps the front smooth while giving the stitches a firmer base. If your fabric is especially slick, you can also try a temporary layer of stabilizer under the fabric while you sew. That extra support can help the feed dogs move the layers more evenly and reduce dragging or bunching.
It is also helpful to make sure the buttonhole area is properly pressed before you begin. Pressing with the correct heat setting for the fabric can make marking and stitching more accurate. Always follow the fabric care instructions and your machine manual, especially if you are using a specialty foot or buttonhole attachment. A little setup time usually pays off with cleaner results and less unpicking later.
Mark Buttonholes With Care
Accurate marking matters even more on slippery fabrics because the material can shift from the moment you mark it to the moment you stitch it. Start by measuring the button and the garment opening requirements according to your pattern. The buttonhole should be long enough for the button to pass through without strain, but not so long that it creates a loose or sloppy closure. If you are unsure, test the fit on scraps using the same fabric layers you plan to sew.
Use a marking method that is visible but gentle on the fabric. Tailor’s chalk, fine tracing tools, or removable marking pens can work well, depending on the material and whether the marks will show through. On shiny or dark slippery fabrics, small thread tacks or tiny clips placed outside the sewing path can also help you keep your placement straight. A ruler or seam gauge makes it easier to line up multiple buttonholes so they look balanced on the finished garment.
Before stitching, double-check the grainline and the direction of the buttonhole. A slight angle can stand out on smooth fabric, so it helps to slow down and verify each mark. If the fabric is very soft or drapey, avoid heavy handling once the marks are in place. The less you disturb the cloth, the more likely it is to stay true when you move it to the machine.
Test Stitch on Scraps First
Test stitching is one of the most helpful habits you can build when learning perfect buttonholes on slippery fabrics. A scrap lets you check stitch length, density, thread tension, and buttonhole width before you commit to the garment. Because smooth fabrics can react differently from cotton or canvas, the sample gives you a better picture of how the final buttonhole will look and feel.
Make your test scrap match the project as closely as possible. Use the same fabric, the same interfacing, and the same number of layers you will use in the actual garment. If the buttonhole will sit over a seam or a thicker area, include that detail in the scrap too. Then sew a buttonhole and examine the result. If the stitches look too loose, too tight, or uneven, adjust one setting at a time and sew another sample. This makes it much easier to understand which change is helping.
Do not skip the test just because the buttonhole looks simple. Slippery fabric can change how the machine feeds, and even a small adjustment can make a noticeable difference. Your machine manual may explain how to fine-tune buttonhole settings for your model, so keep that nearby as you test. A few practice runs can save both time and fabric in the long run.
Browse our recommended products
Our featured picks refresh periodically. While we update them, our editorial guides can help you find the right pick.
See our guidesStabilize the Fabric While Sewing
Once you are ready to sew, keep the fabric as stable as possible from start to finish. Feed it smoothly under the presser foot without pulling, pushing, or forcing the fabric forward. On slippery textiles, even a small tug can distort the stitch line or change the size of the buttonhole. Let the machine guide the stitching, and use your hands mainly to steady the fabric edges and prevent twisting.
If your machine has a buttonhole foot, attach it according to the manufacturer’s instructions and make sure the buttonhole is centered correctly in the foot. Different machines may use different methods for measuring the buttonhole length, so it is important to follow your own manual rather than assuming a universal setup. If your model allows presser foot pressure adjustment, a slight change may improve feeding on slick fabric, but only adjust settings your manual says are safe for your machine.
For especially smooth fabrics, some sewists like to use a small piece of tear-away stabilizer on top or underneath the sewing area to help reduce slipping. Others find that lowering the sewing speed gives better control. The most important point is consistency. Keep your hands calm, maintain even pressure, and stop immediately if the layers begin to drift. A slower pace often produces cleaner, more dependable results than rushing through the buttonhole.
Finish and Open the Buttonhole Neatly
Once the machine finishes stitching, remove the fabric gently and leave a little thread tail before trimming. This small detail helps keep the stitches from loosening, especially on smooth, slippery fabrics. If your machine manual recommends a specific finishing step, follow that first.
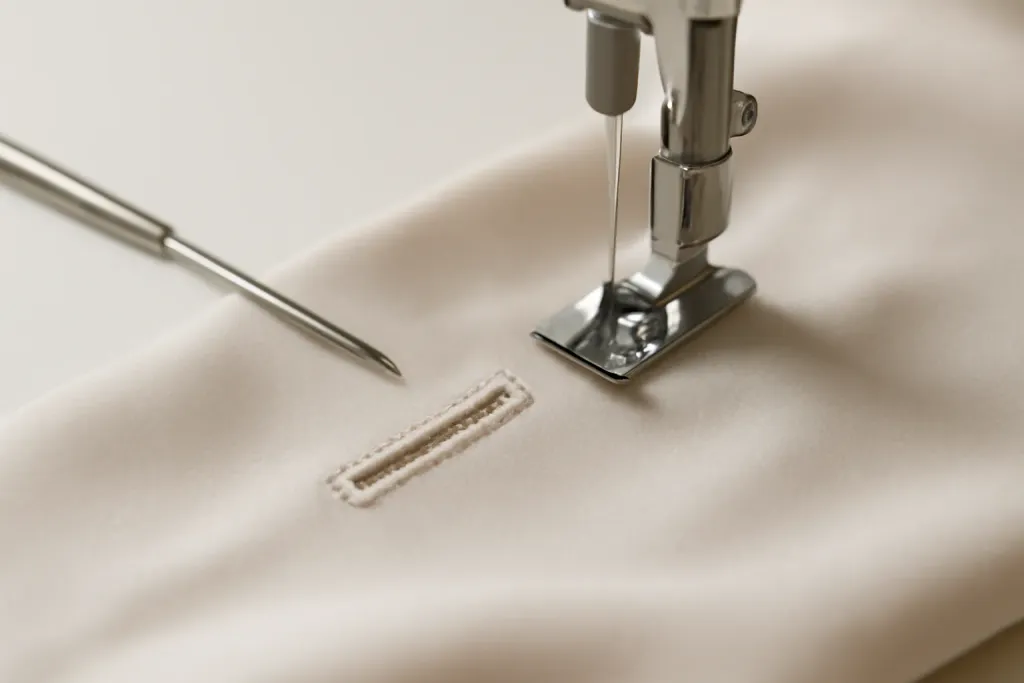
To open the buttonhole cleanly, place a pin across each end to protect the stitches. Then use a sharp seam ripper or buttonhole cutter to cut the center slit in short, careful motions. Work slowly so you do not nick the bar tacks or stretch the fabric. If the fabric is delicate, place a small scrap of stabilizer or a thin cutting mat underneath for support.
When you finish, inspect both sides of the buttonhole. If the edges look soft or slightly wavy, a light press from the wrong side can help set them. For the best results, compare the finished opening with your button size before sewing the rest of the buttons. That final check helps you confirm your perfect buttonholes on slippery fabrics are neat, secure, and ready for use.
Common Mistakes and Simple Fixes
One common mistake is skipping interfacing because the fabric already feels thin and light. On slippery materials, that extra support is often what keeps the buttonhole from stretching out of shape. Another common issue is choosing a thread tension or stitch density that works fine on stable cotton but not on smooth synthetic or drapey fabric. If the stitches look puckered or the buttonhole twists, return to your test scrap and make one small change at a time.
Another challenge is moving the fabric too much while trying to keep it lined up. It is natural to want to guide the fabric firmly, but too much hand pressure can work against the feed dogs. Try to steer lightly instead. If the fabric keeps slipping under the presser foot, a temporary stabilizer or a small amount of spray or adhesive made for sewing may help, as long as it is suitable for your material and your work area is well ventilated. Always read product directions and avoid anything your machine manual warns against.
Finally, do not be discouraged if the first buttonhole is not perfect. Slippery fabrics can require a little experimentation, and even experienced sewists often make a practice sample before sewing the real garment. The goal is not to force the fabric to behave like cotton. The goal is to support it enough that your machine can stitch a clean, reliable opening.
A Simple Repeatable Workflow
If you want a dependable routine for perfect buttonholes on slippery fabrics, keep it simple: stabilize, mark, test, sew, and inspect. First, add the right support to the wrong side of the fabric or use a temporary stabilizer if needed. Next, mark the buttonhole position carefully and confirm the size with the actual button. Then sew at least one practice sample using the same layers and settings you plan to use on the garment.
When the sample looks right, sew the real buttonhole with slow, even control. Let the machine feed the fabric while you guide it lightly. After stitching, open the buttonhole carefully, press if appropriate, and compare it to the button again. If you are sewing several buttonholes on one garment, repeat the same method for each one so the results stay consistent. Consistency is especially helpful on shiny or fluid fabrics where tiny differences can stand out.
Above all, remember that your machine’s manual is the best guide for model-specific features, buttonhole attachments, and safe adjustments. Machines and fabrics vary widely, so what works beautifully on one setup may need a different approach on another. With a bit of preparation and patience, slippery fabrics become much easier to manage, and your buttonholes can look polished, secure, and confidently made.