Why Elastic-Waist Pajama Shorts with Pockets Are a Great First Project
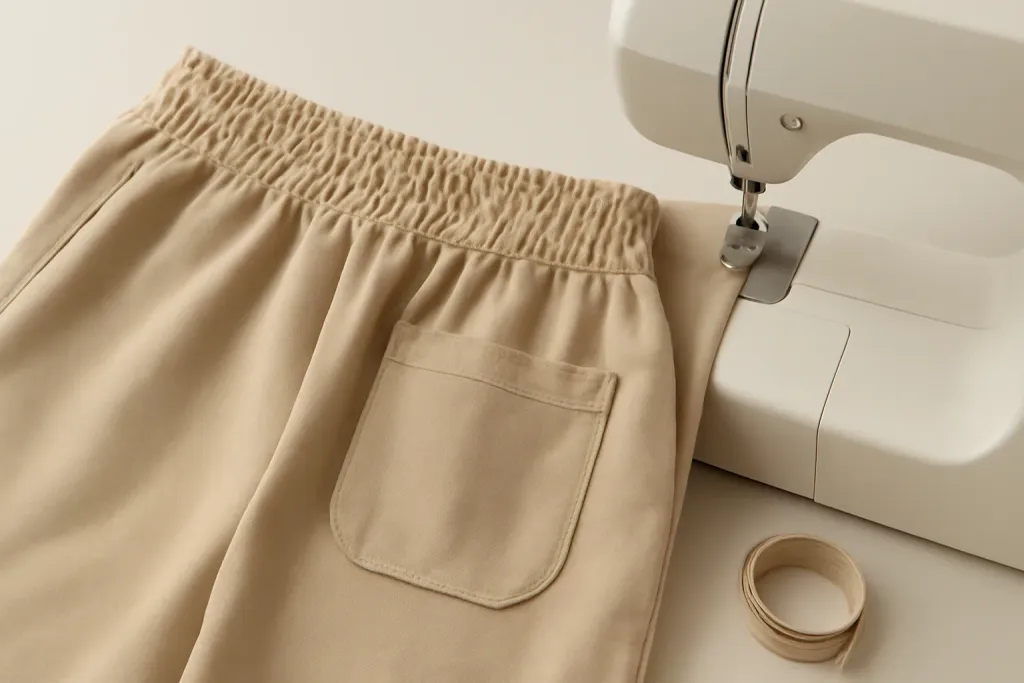
Elastic-waist pajama shorts with pockets are beginner-friendly because the shape is simple, the fit is forgiving, and the elastic waist removes the need for a zipper or button closure. Pockets add useful practice with straight seams and topstitching without making the project complicated. It’s a confidence-building make that teaches cutting, stitching, pressing, and finishing in one practical project. Always check your machine manual for the right setup for your fabric and stitches.
Choosing the Best Fabric and Notions
For elastic waist pajama shorts with pockets, choose a fabric that feels soft, breathable, and easy to sew—cotton lawn, quilting cotton, flannel, rayon blends, or knit fabrics if your pattern allows. Prewash and press your fabric before cutting so shrinkage happens first. For notions, keep it simple: elastic matched to your waist tunnel, thread, pins or clips, and a safety pin or elastic threader. Check your sewing machine manual for the correct needle, stitch, and presser foot for your fabric.
Measuring and Sizing for Comfort
Start with your waist and hip measurements, then compare them to the pattern’s size chart. If you’re between sizes, choose the size that fits your hips and adjust the waist with elastic. For a relaxed sleepwear fit, add a little ease through the shorts leg and rise. Measure the pattern pieces before cutting, and check your machine manual for any stitch settings that help your fabric feed smoothly.
Cutting Layout and Prep Work
Good prep makes the sewing itself much easier. Start by laying your fabric on a clean, flat surface and following the grainline and layout directions in your pattern. If your fabric has a print, check whether the design is directional so the shorts will hang the way you expect. For a beginner, taking a few extra minutes at this stage often saves a lot of unpicking later.
Cut all pieces carefully, including the pocket bags and waistband components if your pattern uses separate pieces. Use pattern weights or pins as needed, but avoid distorting the fabric while you cut. If your fabric is slippery, a rotary cutter and mat can help, though scissors work well too when you go slowly.
Once the pieces are cut, transfer all marks clearly. Notches, pocket placement points, elastic casing fold lines, and hem markings all help the garment come together in the right order. A washable fabric marker or tailor’s chalk can be useful, but test any marking tool on a scrap first to make sure it removes cleanly.
Pressing is part of prep as well. A quick press on cut edges can make pocket construction and waistband folding much cleaner. If your fabric is delicate, use a pressing cloth and the heat appropriate for that fabric. Again, check your machine manual and your fabric care guidance whenever you are choosing stitches, pressing methods, or needle types.
Before you begin stitching, wind a full bobbin and make a few test stitches on scraps from the same fabric. This simple habit helps you confirm tension, stitch length, and needle choice. It is far better to adjust on scraps than to discover a problem after half the shorts are assembled.
Browse our recommended products
Our featured picks refresh periodically. While we update them, our editorial guides can help you find the right pick.
See our guidesSewing the Pockets Neatly
Pockets are the detail that turn simple sleep shorts into a more polished garment. Depending on the pattern, you may sew side-seam pockets, front patch pockets, or another style. Side-seam pockets are especially common because they are practical and blend smoothly into a relaxed short.
When sewing pocket bags, accuracy matters more than speed. Match notches carefully and sew with consistent seam allowances so the pocket opening sits flat. If the pattern tells you to clip curves or corners, do that slowly and stop short of the stitching line. This helps the pocket turn smoothly without stressing the seam.
Press each pocket piece as you go. Pressing can make a pocket opening look much more professional, even in a casual garment. If your fabric frays, finish the pocket edges according to the pattern instructions, using a zigzag stitch, serger, or another method that works with your machine and material. Your machine manual should guide any stitch settings or specialty attachments.
When you attach pockets to the shorts front or side seams, keep the pocket bags aligned so they do not shift while you sew. Clips can be especially helpful here because they hold layers without adding too much bulk. Sew slowly through multiple layers, and if your machine struggles, stop and check that the fabric is feeding evenly. You can also lengthen your stitch slightly on bulky sections if the pattern and fabric allow it.
A practical tip is to understitch or topstitch where the pattern recommends it. These techniques can help the pocket opening stay neat and keep the lining from rolling outward. Small finishing touches like this make the shorts feel more refined, even though they are intended for everyday comfort.
Waistband and Elastic Tips
The waistband is the heart of elastic waist pajama shorts with pockets. A well-made waistband should feel comfortable, stay in place, and be easy to sew without too much frustration. Most patterns use either a folded casing with elastic threaded through or a separate waistband piece that encloses the elastic. Follow your pattern’s construction order, because the details can vary quite a bit.
Before inserting elastic, it helps to check the waistband opening so you know there is enough room to thread it through. Attach a safety pin, bodkin, or elastic threader to one end of the elastic and work it through slowly. Keep the other end secured so it does not disappear into the casing. If you are using a wider elastic, moving a little at a time can prevent twisting and bunching.
Try the waistband on before closing the elastic loop if your pattern suggests that step. This lets you adjust the fit while the shorts are still easy to modify. Once you are happy with the comfort level, overlap the elastic ends securely and stitch them according to the pattern instructions. Then distribute the gathers evenly before closing the casing.
It is worth remembering that elastic can behave differently by brand and type, so what feels comfortable in one project may not feel exactly the same in another. If your pattern recommends a certain width or type, that guidance is usually the safest place to start. Never force a technique that feels awkward; instead, use the instructions that match your tools and experience level.
After the waistband is complete, give the top edge a gentle press from the right side if the fabric tolerates it. Pressing can settle the elastic and help the casing lie smoothly. Keep the heat appropriate for your fabric, and avoid pressing directly in a way that could flatten or damage delicate material.
Hemming and Finishing Touches
The hem is the final step that gives your shorts a clean finish. For woven pajama shorts, a narrow double-fold hem is common and beginner-friendly. Press the hem up once, then again, so the raw edge is enclosed. Stitch slowly and keep the fold even for the neatest result. If your fabric is thick or your curves are pronounced, easing the hem in with a few small clips can help it lie flat.
Some patterns call for a simple turned hem with a straight stitch, while others may suggest a narrow hem or another finish. Choose the method that matches your fabric and your confidence level. The goal is a hem that feels smooth against the leg and looks tidy from the outside. You do not need a highly decorative finish for good sleepwear; consistency matters more than complexity.
Once the hems are stitched, trim loose threads and give the shorts a final press. This is often the moment when the garment starts to look truly finished. If the pockets, waistband, and hems all lie flat, you have likely done the important structural work well.
If you want a more personalized look, keep decoration simple. A contrast thread, small label, or fabric print can add interest without making the project harder. For a first pair, though, it is perfectly fine to keep everything understated and focus on fit and comfort.
Before wearing or gifting the shorts, inspect the seams, waistband, and pocket corners one more time. A quick check can catch a skipped stitch or a twisted casing early. This habit is especially useful if you plan to make several pairs, because it helps you build a consistent quality routine.
Troubleshooting and Building Confidence
Even a simple project can have a few bumps, and that is completely normal. If the pockets seem bulky, try trimming seam allowances carefully where the pattern allows, or press seams in the recommended direction. If the waistband feels uneven, reopen a small section and redistribute the elastic rather than accepting a fit that is uncomfortable.
Stitches that pucker often point to tension, needle, or fabric-handling issues. Test on scraps first, then adjust one setting at a time. Because machines and fabrics vary by model and manufacturer, your machine manual is the best source for stitch guidance, presser-foot details, and needle recommendations. Avoid guessing when a quick manual check could prevent more frustration.
If the shorts come out a little too long or too short, treat that as useful information rather than failure. Simple garments are ideal for learning because each version teaches you something about your preferences. You may discover that you like a slightly shorter inseam, a softer elastic, or a wider leg than you expected.
Most importantly, let this project build your confidence. Elastic waist pajama shorts with pockets teach a broad set of beginner garment skills while staying manageable and useful. Once you have made one pair, you can easily refine the next with a different fabric, a changed pocket style, or a small fit adjustment.
If you are shopping for tools or supplies as you learn, buy with your next few projects in mind. A good measuring tape, reliable scissors, and a fabric you enjoy sewing can support many future makes. That kind of thoughtful shopping fits well with an independent sewing mindset: practical, personal, and focused on what truly helps you sew better.