Overview
Threading is the single most common source of early sewing frustration, mostly because a stitch depends on two separate threads -- the top thread and the bobbin thread -- meeting correctly inside the machine. Get either one wrong, and stitches skip, loop, or the machine jams entirely.
Every sewing machine has its own exact threading path, usually shown as a printed diagram on the machine itself or in the manual. This guide covers the general steps that apply to most home machines, but always defer to your specific model's diagram over general instructions like this one, since guide numbers and tension disc positions vary between brands.
Plan on threading slowly the first several times. Once you've done it a few times on your specific machine, it becomes a fast, almost automatic step before every sewing session.
Winding a bobbin
Start with an empty bobbin and your machine's bobbin-winding mechanism, usually a small spindle on the top or side of the machine. Place your thread spool on the main spool pin, then guide the thread through the machine's bobbin-winding thread guides -- check your manual for the exact path, since this differs from the top-threading path.
Wind the thread around the empty bobbin by hand several times to anchor it, then snap or slide the bobbin onto the winding spindle. Push the spindle into its winding position (most machines have a lever or clutch for this) and run the machine briefly to let it wind automatically.
Stop winding once the bobbin is evenly full but not overfilled -- an overfilled bobbin can cause tension problems and may not fit properly into the bobbin case. Trim the thread tail close to the bobbin before removing it from the spindle.
Inserting the bobbin
Most home machines use either a front-loading bobbin case (a removable metal case you insert into a compartment) or a top-loading drop-in bobbin (placed directly into a compartment under the needle plate). Check your manual to confirm which type your machine uses, since the insertion process differs.
For a drop-in bobbin, the bobbin usually needs to sit in the compartment so the thread unwinds in a specific direction -- often counterclockwise, but check your machine's diagram, since this varies. Guide the thread tail through the small tension slot or groove near the compartment edge before closing the cover.
For a front-loading bobbin case, insert the wound bobbin into the case so thread unwinds in the correct direction, guide it through the case's tension spring slot, and then insert the assembled case into the machine until it clicks or locks into place.
Threading the top thread
With the presser foot raised (this is important -- tension discs are only open when the foot is up, which allows thread to seat correctly between them), place your thread spool on the spool pin and begin following the machine's numbered or marked thread guides in order.
The thread typically passes through an upper guide, down through the tension discs, up and over a take-up lever near the top of the machine, then down through one or more lower guides before reaching the needle. This path threads the take-up lever, which is easy to miss but essential -- if the thread skips this lever, stitches will form incorrectly or not at all.
Thread the needle itself from front to back (or as specified by your machine, since some thread differently), leaving several inches of thread tail extending past the needle's eye. A needle threader tool can help if you find threading the small eye by hand difficult, especially with fine thread.
Browse our recommended products
Our featured picks refresh periodically. While we update them, our editorial guides can help you find the right pick.
See our guidesBringing up the bobbin thread
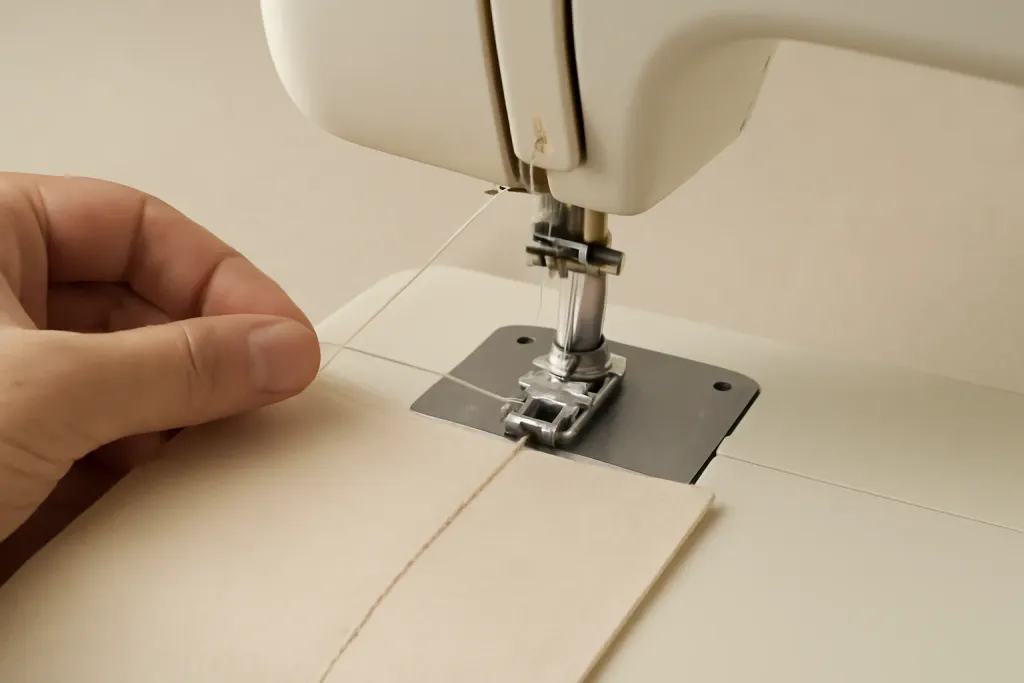
With both threads roughly in place, hold the top thread tail gently and turn the handwheel toward you one full rotation. This lowers and raises the needle once, which should catch the bobbin thread and pull a loop of it up through the needle plate.
Use a pin or your fingers to gently pull that loop of bobbin thread all the way up and out from under the presser foot. Pull both thread tails -- top and bobbin -- back and to the side, under and behind the presser foot, leaving three or four inches of slack before you begin sewing.
This step confirms that both threads are actually engaging with each other, which is the best real-world check that your threading is correct before you commit to sewing a real seam.
Common threading mistakes
Threading with the presser foot down is one of the most common mistakes, since it prevents the tension discs from opening properly, which leads to loose, looping stitches on the underside of your fabric. Always raise the presser foot before threading the top thread.
Skipping the take-up lever is another frequent issue, often because it's positioned above the visible thread guides and easy to overlook. If your machine sews but produces a tangled mess on the underside, missing the take-up lever is one of the first things to check.
Using old, dry, or low-quality thread can also cause threading and tension problems that look like a machine malfunction but aren't. Thread that's been stored for years, or thread pulled from an unraveling or fraying spool, is more likely to catch on tension discs or break mid-seam.
Finally, if you're threading a machine after transporting or storing it, check that the bobbin case or drop-in bobbin hasn't shifted, and that no old thread fragments are caught in the tension area, before assuming a fresh threading attempt has failed.
Building a threading routine
Once you've threaded your machine correctly a handful of times, try to notice the pattern rather than treating each session as a fresh puzzle. Most machines follow a consistent logical order -- spool pin, upper guide, tension discs, take-up lever, lower guides, needle -- and recognizing that structure makes it much faster to catch a skipped step.
Some sewists find it helpful to leave a strip of painter's tape near the machine with their model's thread path jotted down in shorthand, at least for the first few weeks. This is a small habit, but it removes the need to dig out the manual every single session while the path is still new to you.
If you switch between more than one machine, expect to re-learn each one's specific path, even if the general steps are similar. Threading habits from one brand or model don't always transfer directly, and assuming they do is a common source of mistakes when using a borrowed or secondhand machine for the first time.
Over time, most sewists develop a quick self-check before starting a new seam: raise the presser foot, confirm both thread tails are pulled back and clear, and give the handwheel a light turn by hand to confirm the needle moves freely. This small habit takes only a few seconds and catches most threading problems before they turn into a tangled mess mid-seam.
Final thoughts
Threading becomes second nature with repetition, but it's worth doing carefully and in order every time, especially while you're still learning your specific machine's path. When stitches still look wrong after a careful re-thread, the next step is usually a tension check -- see our tension troubleshooting guide for common causes.
Once threading feels comfortable, revisit using a sewing machine for beginners to keep building core skills, and check our needle guide if you suspect your needle -- not your threading -- is the source of a stitching problem.