Why Curved Narrow Hems Are Tricky
Professional narrow hems on curves look simple when they are finished, but they ask a lot from both the sewer and the fabric. A narrow hem works best when the edge can fold evenly, the stitch can stay close to the fold, and the curve can travel smoothly under the presser foot. On a straight edge, those steps are easy to repeat. On a curve, the fabric edge grows and shrinks slightly as it turns, which can cause ripples, puckers, or a hem that wants to twist.
The challenge is even bigger on lightweight fabrics such as voile, rayon, chiffon, or lawn. These materials shift easily and can stretch at the bias. When that happens, a tiny hem may become wavy before you even finish one section. The good news is that a neat result is absolutely possible with patient prep and a few simple habits. You do not need advanced tailoring skills to improve your results; you just need a method that respects the curve.
It also helps to remember that different machines, needles, presser feet, and fabrics behave differently. Always check your own machine manual for guidance on feet, settings, and threading paths. If your machine has a narrow hem foot or rolled hem foot, the manual can show the correct setup for your model. A small test sample is often the best way to learn how your equipment handles the fabric before you commit to the project edge.
Preparing the Fabric Edge
Good preparation makes professional narrow hems on curves much easier. Start by trimming the edge smoothly so there are no jagged spots that can catch or distort the fold. If the curve is very tight, consider clipping or carefully easing the seam allowance so the fabric can lie flat. The goal is not to force the edge into a straight line, but to help it relax enough for a clean fold.
Pressing is especially important. Use a press cloth if your fabric is delicate, and press in small sections rather than dragging the iron along the curve. A gentle press helps train the edge and can reduce rippling before stitching starts. For some fabrics, a light touch of steam can help shape the hem; for others, too much moisture may distort the material. Test first on a scrap, since fabrics and machines vary by manufacturer and model.
If your fabric is very fine or slippery, you may find it helpful to stabilize the edge temporarily. A narrow strip of tissue paper, water-soluble stabilizer, or a very light starch alternative may improve control during stitching, depending on the fabric and your project goals. Use only methods that suit your material, and remove any temporary support according to the product instructions. The key is to keep the curve flat and even before it reaches the needle.
Choosing the Right Hem Style
Not every curved edge needs the same hem treatment. A narrow turned hem, a baby hem, and a rolled hem all create a slim finish, but each behaves a little differently on curves. A very tight inner curve may be easier to manage with a slightly wider narrow hem than with an extremely tiny rolled edge. A gentler outer curve may handle a finer finish without trouble. Matching the hem style to the shape is part of getting a polished result.
For beginners, a two-step narrow hem is often the most forgiving. First, turn and press a small fold, then turn it again and stitch close to the edge. This gives you more control than trying to create the finished hem all at once. If you are using a specialty rolled hem foot, consult the manual for the correct fabric width and stitch settings. Specialty feet can be useful, but they are not magic; they still work best when the fabric is trimmed, pressed, and fed evenly.
Think about the fabric weight too. Heavier fabrics often need a slightly deeper narrow hem to avoid a bulky ridge, while very lightweight fabrics can look elegant with a tiny finish. The right choice is the one that looks balanced on the garment or project. A professional result comes from matching the hem to the curve, not from using the smallest possible fold every time.
Stitching Technique for Smooth Curves
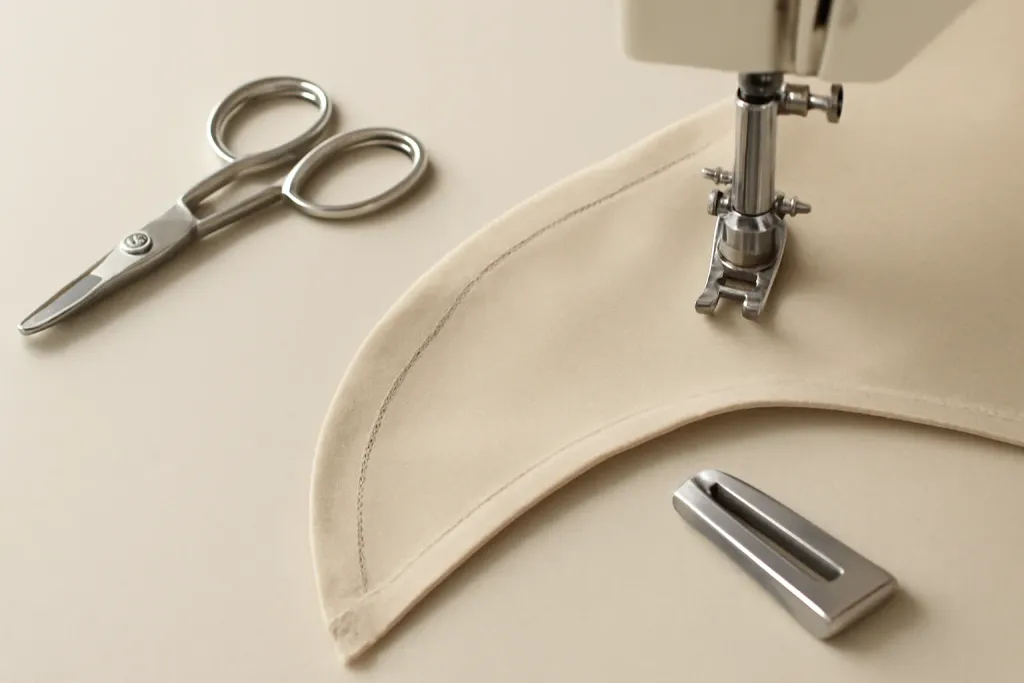
When stitching professional narrow hems on curves, slow and steady beats fast. Begin with a test strip to check stitch length, tension, and foot pressure if your machine allows those adjustments. Then guide the fabric lightly without pulling. Pulling can stretch the edge and create a wavy hem, while pushing can bunch the fabric and cause uneven folds. Let the feed dogs do most of the work.
As you approach the curve, stop often if needed and readjust the fabric so the fold stays aligned. On convex curves, the outer edge may need a little more easing to avoid a flared look. On concave curves, the inner edge may want to pucker unless the fabric is turned carefully. Tiny, frequent corrections usually work better than large movements. If your machine tends to stitch unevenly over layers, keep your hands close but relaxed and watch the fold just ahead of the needle.
Another helpful habit is to stitch a little farther from the edge than you think you need, then trim if necessary, rather than trying to sew too close and risking skipped spots. Different fabrics, needles, and stitch lengths can change the final look, so use scraps from the actual project fabric to find the best balance. The most polished hems often come from quiet control rather than forcing the machine to race through the curve.
Browse our recommended products
Our featured picks refresh periodically. While we update them, our editorial guides can help you find the right pick.
See our guidesUsing Feet, Guides, and Helpful Tools
Many sewers like to use a rolled hem foot or narrow hem foot when making curved hems. These tools can help fold the fabric consistently, especially once you learn how to feed the edge into the scroll or guide. They can be very useful, but they may take practice. Check your machine manual for compatible feet and for the correct presser foot attachment method. Not every accessory fits every machine, and the wrong setup can cause frustration.
Simple tools can help just as much as specialty feet. A stiletto, awl, or seam ripper used carefully as a fabric guide can keep the fold feeding evenly into the needle path. Fine clips may help during preparation, though pins are often better removed before stitching a narrow hem because they can interrupt a smooth feed. A wooden pressing aid, fingernail, or small clapper can also help shape the edge before sewing, depending on the fabric.
If your machine has an adjustable presser foot pressure setting, your manual may explain when a lighter touch helps with delicate fabrics. This is often useful for lightweight curves, where too much pressure can leave marks or distort the edge. Again, test first. The best tool is the one that helps you control the fold without stretching, lifting, or overhandling the fabric.
Troubleshooting Waves and Puckers
If your narrow hem turns wavy, the fabric was likely stretched during preparation or stitching. This is common on curves, especially with bias sections. Try trimming a new sample, pressing the edge more carefully, and handling the fabric more gently at the machine. In some cases, a slightly longer stitch length or a bit less tension can improve the look. Because machines vary, use the settings recommended by your manual as a starting point and adjust gradually on scrap fabric.
Puckers often mean the fabric was fed too tightly or the hem was turned too abruptly. On concave curves, make sure the inner edge can ease into the fold instead of being forced. If needed, slow down and give the fabric more room to settle before each stitch line. Re-pressing the curve after the first fold can also help. For very fine fabrics, trimming a narrow strip away from the edge before hemming may reduce bulk and improve the finish.
If the hem looks uneven in places, do not be discouraged. Narrow hems on curves are one of those details that improve quickly with repetition. A few short practice runs can teach you more than one long attempt. Keep notes about the fabric, needle type, stitch length, and tool combination that worked best. That simple record can save time on future projects.
Finishing and Making It Look Polished
Once the hem is stitched, press it again with care. Final pressing can make a big difference in how professional narrow hems on curves appear. Use enough heat and steam for the fabric, but do not flatten delicate textures that are meant to stay soft or airy. A pressing cloth can protect sensitive fibers, and small, controlled motions are better than sweeping the iron across the curve.
Look closely at the finished edge. A good narrow hem should appear even, smooth, and balanced from every angle. It does not have to be absolutely identical in every millimeter to look professional. The goal is a clean line that follows the curve naturally. If you notice a tiny section that needs attention, it is often better to fix it while the project is still on the table than to hope it disappears later.
For garments and home sewing projects alike, the finish should suit the fabric and the design. A delicate blouse hem may call for a very slim edge, while a curved table accent or skirt hem may benefit from a slightly fuller finish that still reads as neat. Trust the project, trust the fabric, and let the curve guide the final look.
A Practice Plan for Better Results
The fastest way to improve professional narrow hems on curves is to practice on scraps that match your project fabric. Cut samples with both gentle and tighter curves so you can see how the edge behaves in different shapes. Mark each sample with notes about the setup you used. This turns trial and error into useful information instead of guesswork.
Start with a simple workflow: trim, press, test, stitch, and press again. Repeat it until the steps feel natural. If you are trying a new foot or a different fabric type, make only one change at a time so you can tell what improved the result. Small improvements add up quickly. Even a beginner can build a reliable method with a few calm practice sessions.
Most of all, be patient with yourself. Curved hems are detail work, and detail work rewards steady hands and clear preparation. Once you find the rhythm, the process becomes much less intimidating. The curve stops feeling like a problem and starts feeling like part of the design.