Why Full Bust Gaping Happens
If you are searching for pattern alterations for a full bust without gaping, the first thing to know is that gaping is usually a shaping issue, not a sewing failure. A garment may fit across the bust point and still pull away at the neckline, armhole, or center front because the pattern was drafted for a different bust shape and cup depth.
In many commercial patterns, the front bodice assumes a certain amount of room between the high bust and full bust measurements. When your bust is fuller than that draft, extra width may be needed in the bust area without adding unnecessary width everywhere else. If that extra space is not built into the pattern, the fabric can travel over a fuller curve and create wrinkles, drag lines, or gaping edges.
Gaping is not always caused by the bust itself. Shoulder slope, posture, upper back width, armhole shape, and neckline design all affect how a garment sits. A pattern can be too narrow at the bust, too long above the bust apex, or too wide at the neckline. The good news is that many of these issues can be addressed with careful pattern adjustments before you cut your fabric.
For beginners, the key mindset shift is this: you are not trying to make the pattern bigger everywhere. You are trying to redistribute volume so the garment follows your shape more closely. That approach creates a smoother fit and reduces the need for constant tugging or pinning while you wear the finished piece.
Measurements and Pattern Checks Before You Alter
Before making pattern alterations for a full bust without gaping, compare your high bust and full bust measurements to the pattern’s size chart. This helps you choose the base size and judge whether a full bust adjustment is needed. Check finished garment measurements, pattern ease, and the bodice length, then compare the muslin or tissue fit to your body, especially at the bust apex, side seam, and shoulder. Sewing machines vary by model and manufacturer, so always check your machine’s manual for setup details.
Choose the Right Bust Adjustment Method
The most common starting point for pattern alterations for a full bust without gaping is a full bust adjustment, often called an FBA. This adjustment adds width and sometimes length across the bust while keeping the shoulder, neckline, and waist closer to your base size. It is especially useful for fitted woven tops, dresses, and bodices.
If the pattern already has some ease and the issue is mild, you may only need a small FBA or a combination of a bust adjustment and a tissue fit tweak. If the garment is gaping at the neckline or armhole but feels tight at the bust, that is a strong clue that the bust needs more room while the upper bodice should stay the same size.
For princess-seam garments, the adjustment is usually made on the front piece rather than through a standard dart pivot. The goal is still the same: add volume where your body needs it and keep the upper edges smooth. For darted bodices, the extra fullness is often released into the dart area. For sleeveless styles or armhole-heavy designs, you may also need to refine the armhole shape after the bust adjustment.
Some sewists think they should simply size up the entire pattern, but that often creates more gaping, not less. A larger size may fit the bust and still be too loose at the shoulders, neckline, and upper back. A targeted adjustment is usually the better path because it respects the structure of the original design.
If you are working with knit patterns, you may need less adjustment than you expect because stretch fabric gives more ease. Even so, the same fitting logic applies. A knit top can still pull across the bust or gape if the negative ease is too strong for your body shape.
A Simple Full Bust Adjustment Workflow
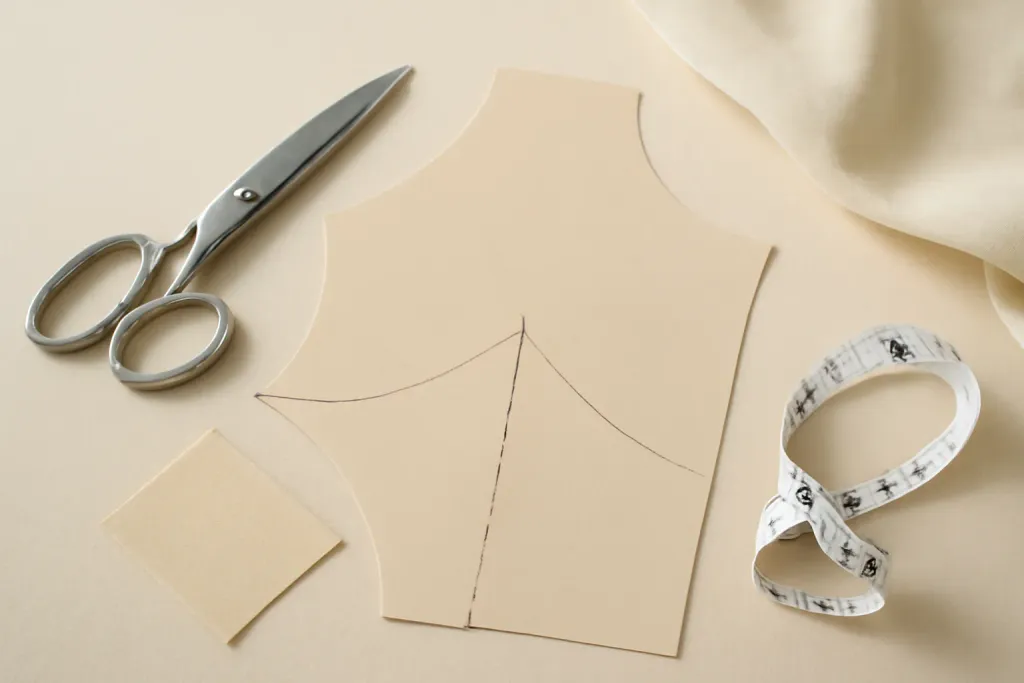
One beginner-friendly way to approach a full bust adjustment is to start by drawing the pattern’s bust apex point and marking the seam lines that control the bust area. You then slash and spread the front bodice in a way that adds width over the bust point while leaving the shoulder and side areas as undisturbed as possible. Many sewists use this method because it creates room without changing the entire garment.
After spreading the pattern, you usually need to smooth the new lines, true the side seam, and make sure the waist and hem still match the back piece. This is one reason a muslin is so helpful: it reveals whether the adjustment added the right amount of bust room or whether you need a little more or less.
When adding bust room, pay attention to the length above the bust apex. A fuller bust often needs extra length as well as width so the fabric can travel over the curve without riding up. If the bodice still feels like it wants to lift, the garment may need a small length adjustment above the bust in addition to width.
Keep your changes modest. It is easier to add a second small adjustment than to remove too much. If you overdo the adjustment, the garment can become loose at the neckline or underarm, which is exactly the problem you are trying to avoid. A careful, measured approach usually gives a cleaner result than a dramatic spread.
When you are done, compare the altered front piece to the back piece at the side seam and shoulder seam. Those seam lengths should still make sense for the garment style. If they do not, true the seams before cutting your test fabric.
Browse our recommended products
Our featured picks refresh periodically. While we update them, our editorial guides can help you find the right pick.
See our guidesFix Gaping at the Neckline and Armhole
After your full bust adjustment, test the neckline and armhole. If they gap, recheck the shoulder slope, bust apex placement, and dart intake; too much width at the upper bodice can pull these edges away from the body. Make small, careful tweaks to the pattern and smooth the seamlines before cutting your final fabric. When using your sewing machine, follow the manual for stitch selection and presser-foot settings.
How Different Pattern Styles Change the Approach
Pattern alterations for a full bust without gaping will look a little different depending on the style of garment. A princess-seam dress, for example, usually responds well to shaping adjustments within the seam lines. The extra room can be distributed across the front panels so the bust curve is supported without adding bulk at the neckline.
With darted blouses and bodices, the dart is one of the main tools for fitting a fuller bust. A larger bust often needs a longer dart or a shifted dart point so the garment can contour smoothly. If the dart point ends too far from the bust apex, you may still see drag lines or pooling of fabric.
Button-front shirts can be especially tricky because gaping may appear at the button placket even when the bust area seems nearly correct. In that case, a bust adjustment may need to be paired with a modest front width change or a check of the button stance and spacing. The goal is a front that closes comfortably without pulling between buttons.
For wrap styles, the overlap and tie placement matter as much as bust width. A fuller bust may need more overlap or a slightly different tie placement to keep the neckline secure. For raglan or dolman designs, the shaping happens differently, so you may need to think about depth and width together rather than relying on a traditional dart or slash-and-spread method.
No matter the pattern style, read the design lines first. The closer your alteration follows the original construction, the easier it is to preserve the intended look of the garment.
Muslin Fitting and Troubleshooting Tips
A muslin, toile, or test garment is one of the most helpful steps in pattern alterations for a full bust without gaping. Even a quick version sewn in similar-weight fabric can show you where the bodice needs more room and where it needs to be taken in. You do not need a perfect test garment; you need enough structure to reveal the fit.
Try the muslin on and look for drag lines radiating from the bust, horizontal tension across the fullest part, gaping at the neckline, or excess fabric at the armhole. Pin along the side seams or darts to test whether the garment responds better to more or less shaping. Take notes or photos so you can remember what changed.
If the bust fits but the neckline still gaps, reduce the upper width or refine the shoulder line. If the neckline is fine but the bust feels compressed, add a little more room through the full bust area. If the garment rides up, add length above the bust or check whether the waist is sitting too high. These clues are more useful than trying to fix everything at once.
Remember that fabric choice affects the final result. A stable woven cotton, a crisp linen, a rayon challis, and a stretchy knit all behave differently. The same alteration may need slight fine-tuning from one fabric to another. That is normal, not a sign that you did anything wrong.
If you sew on a machine, match your stitch and needle choice to the fabric and project, and always consult your machine manual for safe, model-specific guidance. There is no need to push settings beyond what your machine is designed to handle.
A Confident Final Fitting Mindset
The best part of learning pattern alterations for a full bust without gaping is that the process becomes easier with practice. Each fitting teaches you something about how your body and your favorite patterns interact. Over time, you will start to recognize when a design needs a full bust adjustment, when it needs a neckline tweak, and when it simply needs a different size at the shoulders.
Keep your notes. Write down which pattern companies fit you well, how much extra fullness you usually need, and which style lines tend to suit you most. This simple habit can save time on future projects and reduce frustration when you are working with a new pattern.
Most importantly, aim for balance rather than perfection. A garment that fits comfortably and looks smooth across the bust is a success, even if it is not mathematically exact. Sewing is partly technical and partly personal, and the best fit is the one that helps you feel comfortable and confident when you wear it.
If you stay patient, test carefully, and make one change at a time, you can absolutely learn to adapt patterns for a fuller bust without the frustration of gaping. Small, thoughtful adjustments often create the biggest improvement.