Why an Invisible Zipper Disappears So Well
When you are installing an invisible zipper that truly disappears, the goal is simple: let the zipper blend into the seam so the garment looks smooth from the outside. Unlike a standard zipper, an invisible zipper has coils that sit toward the back of the tape. Once stitched correctly, those coils roll inward and the seam closes right up beside them, hiding most of the hardware.
This effect works especially well on dresses, skirts, pillow covers, and fitted garments where you want a neat finish without visible topstitching. The zipper is still there, of course, but the finished look feels cleaner and more polished.
For beginners, the big idea is to respect the zipper’s shape rather than force it into a standard zipper method. Invisible zippers need the seam allowances pressed open, careful alignment, and a zipper foot that can stitch close to the coil. Your machine may have special presser feet or stitch options, but always check your own machine manual before using any accessory or setting.
Tools and Materials You’ll Want Nearby
You do not need a huge list of supplies, but a few reliable tools make the process much easier. Having everything ready before you begin helps you stay calm and accurate.
- An invisible zipper in the correct length for your project
- Your fabric pieces prepared and marked
- Matching thread
- A seam ripper
- Fine pins or fabric clips
- A tape measure or ruler
- An iron and pressing surface
- An invisible zipper foot, if your machine uses one
If your sewing machine came with an invisible zipper foot, read the manual so you know how it attaches and whether it is meant for your specific model. Machines and accessories vary by brand and design, so it is best not to assume every foot works the same way.
Fabric choice also matters. Lightweight fabrics can shift, while thicker fabrics may need extra pressing time or more careful clipping in the seam allowance. You can still get a beautiful result, but the technique may feel different depending on the material.
Prepare the Fabric Before You Sew
Good preparation is what makes an invisible zipper look, well, invisible. Start by finishing your garment pieces as directed in your pattern, including any darts, facings, or interfacing that should be completed before the zipper goes in. Then press the seam allowances open where the zipper will be inserted. This step is essential because the zipper coils need a flat, open area to sit in.
Next, mark the zipper placement on both seam allowances. Use pattern markings if they are provided, or measure carefully from the top edge down to the point where the zipper should stop. Make sure both sides match. If the seam is uneven before you stitch, the zipper will likely look uneven after it is installed.
It can help to baste the seam below the zipper opening with a regular stitch length. This gives you a clear stopping point and lets you test the fit before the final stitching. If your fabric is slippery or delicate, use fine pins or clips sparingly so you do not distort the seam line.
Take a moment to zip and unzip the zipper by hand before sewing. This helps you confirm that the zipper moves smoothly and that the teeth or coils are not twisted. A few seconds here can save a lot of frustration later.
Sew the First Side with Care
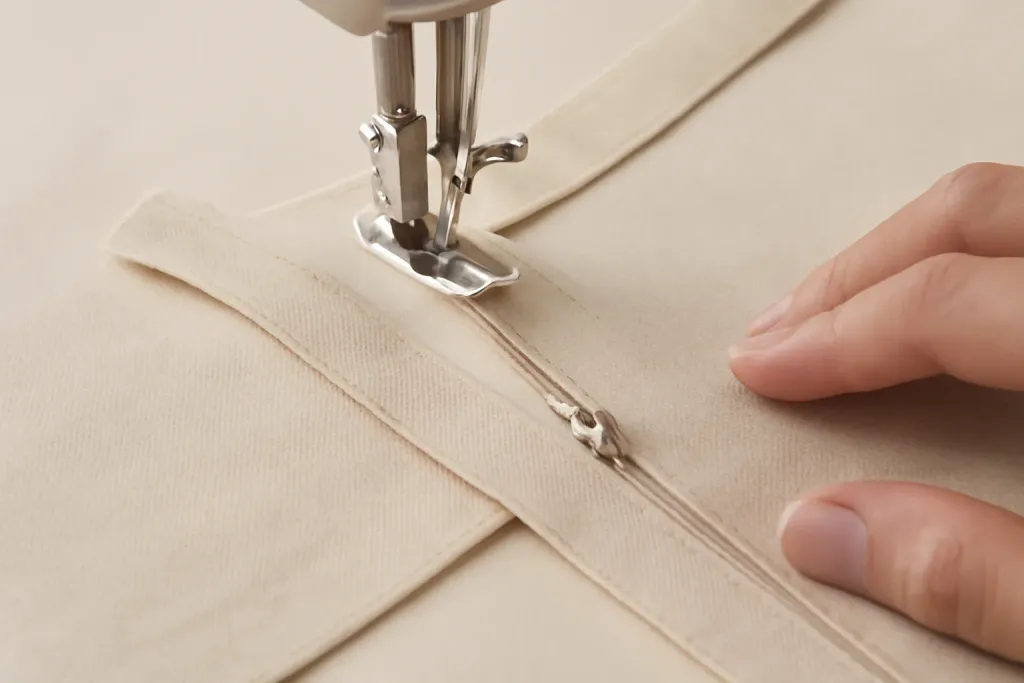
To begin sewing, place the zipper face down on one side of the seam allowance, with the zipper tape aligned to the marked placement line. The coil should sit right on the seam line, not pushed away from it. If you are using an invisible zipper foot, position the coil so the foot can roll it out of the way while the needle stitches close beside it.
Pin or clip the zipper in place, but avoid placing pins where they will interfere with the presser foot. Many sewists like to start at the top and work downward, stopping at the zipper stop. Others prefer to begin a little below the top edge for a cleaner finish. Either method can work, as long as you are consistent and your stitching remains close to the coil.
Sew slowly and do not pull the zipper tape. Let the machine feed it naturally. If you tug, the zipper may ripple or the seam may stretch. At the end of the zipper, stop carefully and backstitch only if your pattern or technique calls for it. Some sewists prefer to secure the ends with a small knot or by stitching slightly into the seam allowance rather than backstitching heavily near the zipper stop.
Once the first side is done, close the zipper partway and check your work. The seam allowance should lie flat and the zipper should not twist. If anything looks off, it is much easier to adjust now than after both sides are sewn.
Browse our recommended products
Our featured picks refresh periodically. While we update them, our editorial guides can help you find the right pick.
See our guidesMatch the Second Side and Stitch It In
The second side is where a careful, patient approach really pays off. Before sewing, lay the zipper so the garment pieces are right sides together again and match the top edges and seam markings. The easiest way to keep things even is to line up the waist seam, neckline, or other major pattern points before pinning the rest.
Then place the second zipper tape face down on the opposite seam allowance, making sure the zipper is not twisted. The zipper teeth or coils should sit symmetrically on both sides of the seam. If one side is slightly higher, your finished zipper may look lopsided even if it functions well.
Sew the second side in the same careful way as the first. It is helpful to compare both sides before the final stitches so you can check whether the zipper pull sits centered when the zipper is closed. If the zipper pull leans to one side, stop and reassess before moving on.
After both sides are stitched, close the zipper and inspect the seam from the right side. This is the moment when the invisible zipper should begin to disappear. You may still see a faint line, but the tape and coils should be tucked neatly into the seam. If one side is noticeably visible, the seam may need a small adjustment or a fresh press.
Close the Bottom Seam and Finish Cleanly
With the zipper installed, the remaining seam below the zipper opening needs to be sewn so the garment can lie smoothly. Open the zipper partway so you can continue stitching below the zipper stop without forcing the zipper through the machine in a cramped way. Align the seam allowances carefully and sew the rest of the seam using your regular seam allowance.
At the junction where the zipper stitching meets the lower seam, aim for a smooth transition. Some sewists like to start at the bottom and sew upward toward the zipper stitching; others prefer to sew down from the zipper and then continue below it. The best method depends on your pattern and comfort level, so choose the approach that helps you keep the seam line consistent.
Once sewn, press the seam open again from the wrong side if the fabric allows. This final pressing helps the zipper settle into the seam and gives the garment a more tailored look. Be mindful of heat settings appropriate for your fabric, and always use a pressing cloth if your material needs protection.
If the zipper extends into a facing or waistband, finish that area according to the pattern instructions. The more carefully you complete the surrounding construction, the more invisible the zipper will appear in the final garment.
Common Troubleshooting for a Better Invisible Finish
Even with careful sewing, a few small problems can happen. The good news is that most of them are fixable.
- The zipper shows too much on one side: The coil may not be sitting close enough to the seam line, or the second side may have been sewn slightly differently. Remove the affected stitches and resew with the coil aligned more closely.
- The zipper feels stiff: The tape may have been pulled while sewing, or the seam may need more pressing. Try pressing gently from the wrong side and test the zipper again.
- The seam is puckered: This can happen if the fabric was stretched while stitching. Reseam the problem area and let the machine feed the zipper tape naturally.
- The top edges do not match: Check your markings and top edge placement before sewing the zipper again. Accurate alignment at the top is important for a balanced look.
If your machine behaves differently with a certain foot or stitch setting, refer to the manual for your model. Sewing machines vary a lot, and the safest way to avoid damage or poor stitching is to use the setup recommended by the manufacturer. Avoid internal repair or mechanical adjustments unless your manual specifically instructs you to do so and you are following approved guidance.
When frustration rises, it often helps to pause and press the area before making any more changes. A fresh eye and a cool head can reveal a simple fix.
Final Check and Care After Installation
After the zipper is in place, give the garment a final inspection from both sides. Zip it slowly and make sure the pull moves smoothly. Look at the right side in natural light if possible, since lighting can affect how visible the zipper seems. A truly well-installed invisible zipper should blend into the seam and not interrupt the garment’s shape.
Trim any stray threads, gently press the area one last time, and confirm that the top edge sits neatly. If you plan to wear or use the item often, test the zipper a few times so you know it opens and closes without catching.
For care, follow the fabric’s washing and pressing needs. Heat, agitation, and heavy wear can affect any zipper over time, so gentle handling helps the finish last longer. If the garment needs laundering, close the zipper first to reduce stress on the tape and seam.
Once you have practiced installing an invisible zipper that truly disappears a few times, the process starts to feel much more manageable. Small details like pressing, alignment, and slow stitching make the biggest difference. With patience, you can create a clean finish that looks confident and polished.